DIY Fence Made of Pallet Wood – A Budget‑Friendly, Eco‑Friendly Upgrade for Your Yard
Published: November 6 2025
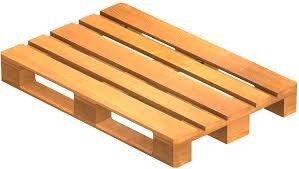
If you’re hunting for a low‑cost, sustainable way to add privacy, curb appeal, or a playful backdrop to your garden, look no further than the humble wooden pallet. Those ubiquitous shipping crates that line loading docks and warehouses can be transformed into a sturdy, stylish fence that reflects your personal flair—without draining your wallet or the planet.
In this guide we’ll walk you through everything you need to know:
| Section | What you’ll learn |
|---|---|
| Why pallet wood? | Environmental and financial benefits |
| Planning & design | Choosing a style, measuring, and obtaining pallets |
| Pre‑construction prep | Disassembly, cleaning, and safety |
| Step‑by‑step build | Detailed instructions plus optional tools |
| Finishing touches | Staining, painting, and sealing |
| Maintenance & longevity | How to keep your fence looking fresh |
| Creative variations | Ideas for upgrades, lighting, and plant integration |
| Common pitfalls & FAQs | Troubleshooting tips |
Grab a coffee, pull up a workbench, and let’s dive in!
1. Why Choose Pallet Wood for a Fence?
| Benefit | What it means for you |
|---|---|
| Cost‑effective | A single pallet can be sourced for free (or as low as $2‑$5) from local retailers, warehouses, or recycling centers. A 6‑foot fence spanning 50 ft typically needs 30–40 pallets – still a fraction of the price of pressure‑treated lumber. |
| Eco‑friendly | Repurposing pallets keeps them out of landfills and reduces demand for newly milled timber. Many pallets are already treated with heat or minimal chemicals, so you’re re‑using what’s already out there. |
| Rustic charm | The weathered, reclaimed look adds instant character. Pair it with a matte black stain or a bright pop of color for a modern twist. |
| Customizable | Pallet boards vary in length (usually 48 inches) and thickness (½–¾ in). You can mix and match to create patterns, gaps, or integrated planters. |
| DIY‑friendly | Most pallets are built with simple nail‑in‑board construction, making them easy to dismantle with a pry bar or reciprocating saw. |
Pro tip: Look for pallets stamped with “HT” (heat‑treated) rather than “MB” (methyl bromide) or “KW” (chemically treated). Heat treatment is safer for outdoor use and usually permitted in most building codes.
2. Planning & Design
2.1 Determine the Purpose
- Privacy – Close‑spaced boards, slatted or solid panels.
- Boundary marker – Gaps between boards for airflow and light.
- Garden backdrop – Combine with trellis for vines.
- Decorative accent – Partial fence, half‑height, or “hanging” segments.
2.2 Measure Your Space
- Mark the line where the fence will sit using string and stakes.
- Calculate length (total linear footage) and height (typical backyard fences range 4–6 ft).
- Add 10‑15 % extra for waste and mistakes.
2.3 Sketch a Simple Plan
| Design | Visual style | Board spacing | Ideal uses |
|---|---|---|---|
| Solid Pallet Wall | Overlapping full‑width boards | 0 in (tight) | Maximum privacy |
| Vertical Slats | Boards placed edge‑to‑edge, vertical | ½ in gap | Modern look, airflow |
| Horizontal “Lattice” | Alternate layers of full & half‑length pieces | 1‑2 in | Light diffusion, plant support |
| Mixed‑Media | Pallet fence + reclaimed metal or glass | Custom | Artistic focal point |
You can sketch on paper or use free tools like SketchUp Free or the “Planner 5D” app to visualize the final result.
3. Sourcing & Preparing Pallets
3.1 Where to Find Pallets
| Source | Typical cost | Tips |
|---|---|---|
| Local hardware stores (Home Depot, Lowe’s) | Free to $5 per pallet | Ask for “clean, HT pallets” on the loading dock. |
| Grocery or furniture stores | Free (often) | Bring a truck or ask if they can deliver. |
| Online marketplaces (Craigslist, Facebook Marketplace) | $5‑$20 per pallet | Inspect photos for damage before buying. |
| Recycling centers | Free (might require a fee) | Confirm they accept pallets for reuse. |
3.2 Safety First
- Inspect each pallet for broken boards, splinters, and nails. Discard any that are rotted or heavily warped.
- Wear gloves, safety glasses, and a dust mask when dismantling.
- Remove all nails (both nails in the pallet and any staples) using a nail puller, pliers, or a hammer and chisel.
3.3 Dismantling Techniques
| Tool | When to use |
|---|---|
| Reciprocating saw (Sawzall) | Quick cuts through the central stringer; ideal for large batches. |
| Circular saw with a fine‑tooth blade | Cutting long board lengths in one pass. |
| Pry bar + hammer | Removing boards without cutting (preserves full length). |
| Nail puller or cat’s‑paw | Extracting embedded nails after boards are removed. |
Workflow:
- Separate the top and bottom deck boards.
- Remove the two long stringers (the “spine”).
- Sort boards by length, width, and condition.
- Stack the usable pieces on a flat surface for sanding.
3.4 Cleaning & Conditioning
- Sanding: Start with 80‑grit, finish with 120‑grit for a smooth surface.
- Cleaning: Wipe with a damp cloth, then let dry completely.
- Optional treatment: Apply a wood preservative (e.g., copper‑naphthenate) for extra rot resistance, especially if the pallets were not pre‑treated.
Remember: Pallet wood can have uneven grain and knots. Embrace the natural irregularities—they add charm!
4. Building the Fence – Step‑by‑Step
Below is a basic “solid pallet wall” approach. Adjust the spacing and layout to fit your chosen design.
Materials & Tools Checklist
| Item | Quantity (approx.) |
|---|---|
| Pallet boards (48 in × 12 in × ½‑¾ in) | 30‑40 |
| 2×4 pressure‑treated posts (8 ft) | 6‑8 (spaced 6‑8 ft apart) |
| Galvanized deck screws (3 in) | 5 lb |
| Concrete mix (Quick‑Set) | 2 bags per post |
| Gravel for drainage | 1 cu ft per post |
| Level, tape measure, carpenter’s square | 1 each |
| Post‑hole digger or auger | 1 |
| Power drill/driver, circular saw, reciprocating saw | 1 each |
| Protective gear (gloves, goggles, dust mask) | 1 set |
| Stain or paint + sealant (optional) | As needed |
4.1 Set the Posts
- Mark post locations along your string line, spacing them 6–8 ft apart (standard fence panels).
- Dig holes 2 ft deep (or 1/3 the post length) using a post‑hole digger. Width should be 12 in.
- Add 6 in of gravel at the bottom for drainage.
- Place the post, level it, and fill with concrete. Set the post straight before the concrete sets (use a level on all sides).
- Let cure for at least 24 hrs.
4.2 Attach the Bottom Track (Optional)
If you want a clean, uniform base, install a horizontal 2×4 track on the ground between the posts:
- Cut 2×4s to the exact spacing between posts, nail them to the posts with galvanized nails or deck screws.
- This track will hold the bottom row of pallet boards and keep the fence level.
4.3 Install the Pallet Boards
- Lay out your boards on the ground to verify lengths and pattern.
- Start at one end: Align the first board vertically (or horizontally, depending on design) with the post or track. Leave a ½‑in gap for wood expansion if you anticipate extreme humidity.
- Secure the board with 3‑in deck screws: two screws on each side, 1.5 in from the top and bottom edges.
- Continue board by board, staggering joints for extra strength (like brickwork).
- Check for level every 4–5 boards; adjust as needed.
4.4 Reinforce (Optional)
- Horizontal blocking: Add a 2×4 or 2×6 strip halfway up the fence, screwed to the boards, to reduce wobble.
- Diagonal bracing: For taller fences (≥6 ft), install a diagonal brace from the top corner to the bottom post for wind resistance.
4.5 Finish the Top Edge
- Cap with a 2×4 (flush or slightly overhanging) for a polished look and added stability.
- Add a slat row for a decorative “crown” if you prefer a more open feel.
5. Staining, Painting, & Sealing
| Finish type | Pros | Cons |
|---|---|---|
| Penetrating oil stain (e.g., Minwax, Sikkens) | Highlights grain, easy to reapply, good water resistance | Requires multiple coats in harsh climates |
| Exterior paint (latex or oil‑based) | Wide color range, hides imperfections | Peels over time; may need sanding before repaint |
| Clear sealant (spar urethane) | Preserves natural look, UV protection | Slightly glossy finish; may yellow over decades |
Application steps:
- Sand lightly (150‑grit) to open pores.
- Clean with a tack cloth.
- Apply the finish with a brush or spray, following wood‑grain direction.
- Let dry per manufacturer’s instructions (usually 4–6 hrs).
- Apply a second coat for durability.
Tip: If you want a weathered, distressed look, sand the edges aggressively after staining to reveal raw wood underneath.
6. Maintenance – Keeping Your Pallet Fence Fresh
| Frequency | Task |
|---|---|
| Monthly | Check for loose screws; tighten as needed. |
| Seasonally (spring/fall) | Inspect for cracks, splinters, or rot; replace damaged boards. |
| Annually | Reapply sealant or paint (especially after harsh winters). |
| After storms | Remove debris, clean moss, and ensure drainage holes (if any) are clear. |
Preventative tricks:
- Install a drip edge at the bottom to keep moisture away from ground contact.
- Elevate the fence by 2‑3 in using small spacers (rotated pallets work well) for airflow.
- Trim surrounding vegetation to avoid excess humidity and pest exposure.
7. Creative Variations & Add‑Ons
- Planter Boxes – Cut a section of the fence to hold a shallow box; line with landscape fabric and fill with soil.
- Integrated LED Lighting – Strip warm‑white LED tape behind the boards for a “glow‑in‑the‑dark” effect.
- Vertical Garden – Attach a grid of small pots or a pocket system for herbs and succulents.
- Mixed‑Material Accent – Combine reclaimed metal brackets or decorative wrought‑iron scrollwork between pallet panels.
- Artwork & Murals – Paint a whimsical mural on the back side of the fence for a hidden surprise.
8. Common Pitfalls & FAQ
Q1: Can I use pallets that have been treated with chemicals?
A: Avoid pallets marked “MB” (Methyl Bromide) or “KD” (Kiln‑Dried with chemicals). Heat‑treated (“HT”) pallets are safe for outdoor use.
Q2: Do I need a building permit?
A: This varies by municipality. Usually, a fence under 6 ft doesn’t require a permit, but check local codes for setbacks and height limits.
Q3: What if the boards warp over time?
A: Properly seasoned pallet wood (HT) is less prone to warping. Allow for a small expansion gap and apply a protective sealant to reduce moisture absorption.
Q4: Can I attach the fence directly to my house?
A: Yes, but use pressure‑treated blocking between the fence and the house to prevent moisture wicking into the siding.
Q5: How do I handle uneven ground?
A: Use adjustable post bases (metal brackets with leveling screws) or embed the posts in concrete with a slight slope to keep the fence level.
9. Quick‑Start Checklist (Print‑Friendly)
□ Measure fence line & mark post locations
□ Source 30–40 HT pallets (free/low‑cost)
□ Gather tools: drill, saws, level, post‑hole digger
□ Dig post holes, add gravel, set posts with concrete
□ Dismantle pallets, remove nails, sand boards
□ Layout board pattern on the ground
□ Install bottom track (optional) & start nailing boards
□ Add horizontal reinforcement (optional)
□ Finish top edge & cap
□ Stain/paint/seal fence
□ Clean up & enjoy!
Final Thoughts
A fence built from pallet wood isn’t just a budget hack—it’s a statement about resourcefulness, sustainability, and personal style. By following the steps above, you’ll create a functional barrier that ages gracefully, supports vines or artwork, and serves as a conversation starter for every visitor.
Ready to start? Head out to your nearest warehouse, bring a handful of pallets home, and let the transformation begin. Share your progress and finished look on Instagram with the hashtag #PalletFenceDIY—we’d love to see how you’ve turned ordinary shipping crates into an extraordinary backyard feature!