The Ultimate Guide to Building a Wood‑Pallet Firewood Rack
If you’ve ever stood in your garage, stare at a heap of firewood, and wondered how to keep it dry, organized, and ready for the next chill, you’re not alone. The good news? A wood‑pallet firewood rack is one of the simplest, most cost‑effective solutions you can DIY. In this post you’ll learn why pallets work so well, how to design a rack that fits your space, step‑by‑step build instructions, and how to maintain it for years of hassle‑free heating.
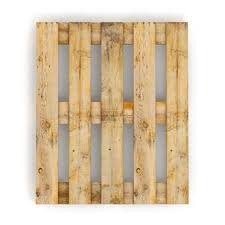
1. Why Choose a Pallet‑Based Firewood Rack?
| Feature | Pallet Rack | Traditional Metal Rack | PVC/Plastic Rack |
|---|---|---|---|
| Cost | $0‑$30 (often free) | $80‑$200 | $50‑$150 |
| Weight | Light – easy to move | Heavy | Very light |
| Eco‑Friendliness | Reuses waste wood | New steel/plastic | New plastic |
| Ventilation | Natural gaps in slats | Often solid panels | Usually solid |
| Customizability | Cut, stack, paint | Limited | Limited |
| Durability (indoors) | 5‑10 yrs with sealant | 10‑15 yrs | 8‑12 yrs |
Pallets are abundant, inexpensive, and already designed for airflow—perfect for keeping firewood dry.
Key benefits for you:
- Budget‑friendly – Many pallets can be scooped up for free from grocery stores, hardware shops, or construction sites.
- Easy to modify – You can cut, nail, or paint them to match any décor.
- Great ventilation – The slatted design promotes airflow, reducing moisture and speeding up seasoning.
- DIY pride – Building your own rack is a rewarding weekend project that adds functional style to a garage, shed, or patio.
2. Planning Your Rack
Before you swing a hammer, answer these questions:
| Question | Why It Matters |
|---|---|
| How much firewood do you store? | Determines rack dimensions and weight capacity. |
| Where will the rack live? | Indoor (garage/shed) vs. outdoor (patio) affects material treatment and base design. |
| Do you need mobility? | Adding wheels or casters can help with cleaning or repositioning. |
| What tools are at your disposal? | Basic tools (hammer, drill, saw) are enough, but a circular saw speeds up cuts. |
| What aesthetic do you prefer? | Stained, painted, or raw wood? This influences finishing products. |
Typical dimensions for a family that burns a cord of wood a season are 48 in × 24 in × 36 in (L × W × H). This size holds roughly 2–3 ft³ of split logs, enough for most heating needs.
3. Materials & Cost Breakdown
| Item | Quantity | Approx. Cost* | Notes |
|---|---|---|---|
| Standard 48‑in‑long pallets | 4 (for sides + base) | $0 – $20 (free or $5 each) | Look for pallets with no broken slats. |
| 2 × 4 lumber (for frame reinforcement) | 4 pieces, 8 ft | $4 each | Optional but adds strength. |
| Deck screws (3‑in) | 1 lb box | $6 | Rust‑proof or coated. |
| Wood sealant or exterior paint | 1 qt | $12 | Protects from moisture. |
| Casters (optional) | 2 – 4 | $8 each | For mobile racks. |
| Total Estimated Cost | — | $30‑$70 | Depends on free pallet availability & finish. |
*Prices are based on U.S. retail averages (2025).
4. Step‑by‑Step Build Instructions
Step 1 – Gather & Inspect Pallets
- Select four pallets of the same size and condition.
- Check for nails or staples—remove them with a pry bar or hammer.
- Lay pallets flat and sweep away dirt and debris.
Step 2 – Create the Base
- Position two pallets side‑by‑side on the floor to form a 48 in × 48 in square.
- Secure them together with four 3‑in deck screws driven through the corners into the adjacent pallet.
- If you want a raised base (helps keep wood off damp floor), attach 2 × 4s as short “feet” (4 in tall) at each corner and screw through the pallet top.
Step 3 – Build the Side Walls
- Stand the remaining two pallets upright on the long edges of the base, forming a U‑shape.
- Align the top edges so the rack height is ≈36 in (adjust by cutting the pallets if needed).
- Fasten the side pallets to the base using four screws per corner (total 16). For extra rigidity, add a 2 × 4 cross‑brace between the two side walls near the top, screwed through the pallet slats.
Step 4 – Add a Back Panel (Optional)
If you prefer a three‑sided rack to keep wind off the wood, attach a fourth pallet as a back wall. Use six to eight screws per corner for solid support.
Step 5 – Finish & Protect
- Sand any rough edges with a medium‑grit sandpaper.
- Apply a coat of exterior wood sealant (or paint) to all exposed wood, especially the bottom. Two coats, 24 hr apart, give the best protection.
- Let the finish cure fully (about 6 hours for sealant, 24 hours for paint).
Step 6 – Load Your Firewood
Place split logs on top of the base, leaning them against the side walls. The natural gaps in pallet slats allow air to circulate, helping the wood stay dry and seasoned.
5. Safety & Maintenance Tips
| Tip | Reason |
|---|---|
| Keep the rack off the ground | Prevents moisture wicking from concrete or dirt. |
| Leave a 2‑in gap between wood and walls | Encourages airflow and reduces rot. |
| Cover the top with a tarp or metal sheet | Shields wood from rain/snow while still allowing ventilation. |
| Inspect for loose nails/screws quarterly | Prevents splinters and structural failure. |
| Re‑apply sealant every 2‑3 years | Maintains water resistance, especially after harsh winters. |
6. Customizing Your Rack
- Add a Roof: Install a simple sloped sheet of plywood or corrugated metal for year‑round protection.
- Integrate a Wheel Kit: Swap the fixed feet for swivel casters (rated ≥ 150 lb) for easy relocation.
- Paint to Match Décor: Choose a bold color for a farmhouse look, or a natural stain for a rustic vibe.
- Incorporate a Shelf: Use a short, sturdy board across the top to store kindling or tools.
7. Frequently Asked Questions
Q1: Can I use pallets that have been treated with chemicals?
A: Avoid pallets stamped with “MB” (methyl bromide) or “HT” (heat‑treated) labels if the wood will be in direct contact with firewood. Opt for “DP” (depot) or “WT” (water‑treated) pallets, which are generally safer.
Q2: How much firewood can a standard pallet rack hold?
A: A 48 × 24 × 36 in rack holds roughly 2–3 ft³ of split logs, equivalent to 0.15‑0.22 cords. Adjust dimensions for larger storage needs.
Q3: Do I need to treat the wood before building?
A: Light sanding and a coat of sealant or exterior paint are sufficient. If pallets are very dry or have exposed splinters, a quick sand‑and‑seal routine will prolong their life.
Q4: Is this rack suitable for outdoor use?
A: Yes, provided you apply a water‑resistant finish and keep the bottom raised to prevent ground moisture. Adding a roof is advisable for direct rain exposure.
Q5: What tools are essential?
A: Hammer or nail gun, drill/driver, circular or hand saw, screwdriver, tape measure, and a level. Optional: router for decorative edges.
Q6: Can I recycle the pallets after the rack is no longer needed?
A: Absolutely. Pallets are compostable or can be repurposed as garden beds, compost bins, or even as firewood themselves once they’re no longer structurally sound.
Q7: How do I prevent termites or insects from nesting in the pallet wood?
A: Apply an insect‑resistant wood treatment or use a sealant that contains a mild biocide. Regularly inspect for signs of infestation and keep the rack clean of debris.
8. Wrap‑Up: Your Next Steps
Now that you have a complete blueprint, it’s time to roll up your sleeves. Start by locating a few pallets, and as you gather your tools and materials, picture the finished rack standing proudly against your garage wall, holding the warm, dry logs that will keep your home snug through the frost.
Building a wood‑pallet firewood rack not only saves money but also gives you a reusable, environmentally friendly storage solution that can evolve with your needs. Whether you keep it simple or add a roof, wheels, and a splash of color, the result is a functional piece you crafted yourself.
Ready to start? Grab a coffee, head to the nearest loading dock, and let the DIY adventure begin. Happy building—and may your fire always burn bright!