DIY Wood Pallet Flower Bed: A Step‑by‑Step Guide for a Green Thumb on a Budget
If you love the idea of turning a discarded wooden pallet into a vibrant flower‑filled garden, you’re in the right place. This post walks you through everything you need to know—design considerations, tools, cost, construction steps, and maintenance tips—so you can create a sturdy, attractive flower bed without hiring a landscaper.
Why Choose a Wood Pallet Flower Bed?
| Benefit | How It Helps You |
|---|---|
| Cost‑Effective | Pallets are often free or inexpensive from hardware stores, farms, or recycling centers. |
| Eco‑Friendly | Reusing pallets reduces wood waste and gives the material a second life. |
| Quick Assembly | With basic tools, you can build a functional bed in a single weekend. |
| Customizable Size | You decide the dimensions, shape, and height to fit any space—from balconies to backyard corners. |
| Rustic Aesthetic | The weather‑worn look of reclaimed wood adds charm and blends well with natural garden décor. |
Planning Your Pallet Flower Bed
Before you start hammering, spend a few minutes sketching out your design and gathering information.
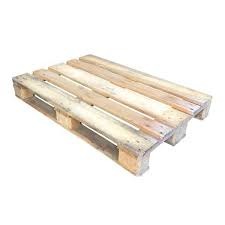
1. Choose the Right Pallet
- Condition: Look for pallets that are not chemically treated (avoid “HT” heat‑treated pallets). The stamp “HT” or “KD” (kiln‑dried) is safe; “MB” (methyl bromide) or “DP” (treated with fumigants) should be avoided.
- Integrity: Check for cracks, splinters, or missing boards. A pallet with at least four solid side rails will hold up best.
2. Decide on Orientation
- Vertical (Upright) Bed: Ideal if you want a tall, narrow display (perfect for small patios).
- Horizontal (Flat) Bed: Works when you want a low, wide garden that can also double as a sitting platform.
3. Determine Soil Volume
Calculate the amount of soil you’ll need using the formula:
[ \text{Soil Volume (cubic feet)} = \text{Length (ft)} \times \text{Width (ft)} \times \text{Depth (ft)} ]
For a 4‑ft × 2‑ft pallet bed that’s 12 in (1 ft) deep:
(4 \times 2 \times 1 = 8) cubic ft of soil.
Materials & Tools Checklist
| Item | Approx. Quantity | Recommended Brand/Type | Estimated Cost (USD) |
|---|---|---|---|
| Reclaimed wood pallets | 2–3 (depending on size) | HT‑treated, clean pallets | $0–$20 (often free) |
| Exterior‑grade screws | 1 lb | Stainless steel or galvanized | $8 |
| Wood glue (optional) | 1 bottle (8 oz) | Polyurethane‑based | $6 |
| Drill & driver bits | 1 set | Cordless drill | $60 (if you don’t own) |
| Circular saw or handsaw | 1 | 7‑inch blade | $30 |
| Sandpaper or orbital sander | 1 pack (80‑120 grit) | $12 | |
| Landscape fabric | 1 roll (3 × 50 ft) | UV‑protected | $15 |
| Potting soil mix | 8 cubic ft (see calculation) | Ready‑mix garden soil | $70 |
| Mulch (optional) | 2 cubic ft | Hardwood bark | $30 |
| Paint/Sealant (optional) | 1 gal | Outdoor, non‑toxic | $25 |
| Safety gear (gloves, goggles) | 1 set | $10 |
*Total approximate cost: $250 (most of which is reusable for future projects).
Step‑by‑Step Construction
Step 1 – Clean & Disassemble
- Inspect each pallet for nails, staples, or screws. Use a hammer or pliers to remove them.
- Wash the wood with a garden hose and mild detergent to eliminate dirt and debris. Let it dry completely (24 h).
Step 2 – Cut to Size
- Measure the desired dimensions of your flower bed.
- Using a circular saw, trim the pallet boards to length. If you want a deeper bed, you may need to stack two pallets and screw them together.
Step 3 – Build the Frame
- Lay the pallet sides in a rectangle on the ground.
- Drill pilot holes (¼ in) at each corner to prevent splitting, then drive exterior‑grade screws (2‑in) through the side rails into the top and bottom boards.
- For added strength, apply a bead of wood glue along each joint before screwing.
Step 4 – Add Support Crossbars (Optional)
If your bed will hold heavier pots or deep soil, install crossbars inside the frame at 12‑inch intervals. This prevents bowing.
Step 5 – Line the Bed
- Roll out landscape fabric inside the frame, cutting it to fit. Secure the edges with a staple gun or a few screws.
- This barrier stops soil from leaking through gaps while allowing water drainage.
Step 6 – Fill with Soil
- Layer 2‑3 in of coarse material (small gravel or crushed stone) for drainage.
- Add the potting soil mix on top, tamping gently to eliminate air pockets.
Step 7 – Plant Your Flowers
Choose a mix of perennials and annuals that suit your light conditions (see table below). Plant according to spacing recommendations on seed packets, then water thoroughly.
Step 8 – Finishing Touches
- Mulch the surface to retain moisture and suppress weeds.
- If you desire a painted look, apply outdoor paint or sealant now. Let it cure for 24 h before re‑watering.
Plant Pairings for a Pallet Bed
| Light Requirement | Suggested Flowers (Perennial) | Approx. Bloom Time |
|---|---|---|
| Full Sun (6+ h) | Lavender, Coreopsis, Black-eyed Susan | Summer |
| Partial Shade (3–6 h) | Astilbe, Hellebore, Columbine | Spring‑Fall |
| Full Shade (0–3 h) | Hostas, Ferns, Impatiens (annual) | Summer |
Tip: Use taller varieties (e.g., lavender) at the back of a horizontal bed and shorter ones (e.g., impatiens) at the front for a tiered visual effect.
Maintenance Checklist
| Task | Frequency | How‑to |
|---|---|---|
| Watering | 2–3× /week (adjust for rain) | Water at soil level; avoid wetting foliage to reduce fungal risk. |
| Weed removal | Bi‑weekly | Pull weeds by hand; the landscape fabric reduces emergence. |
| Soil refresh | Annually (early spring) | Loosen top 2‑in of soil, add compost, and re‑mulch. |
| Sealant re‑application | Every 2–3 years | Sand lightly, clean, then apply a fresh coat of sealant. |
| Structural inspection | Every 6 months | Tighten any loose screws and replace any rotted boards. |
Safety & Sustainability Considerations
- Avoid chemically treated pallets—they can leach toxins into the soil.
- Wear safety gear while cutting and drilling to protect eyes, ears, and hands.
- Dispose of scrap wood responsibly; you can repurpose off‑cuts for garden edging or compost bins.
Frequently Asked Questions (FAQ)
Q1: Can I use a pallet that has the “HT” stamp?
A: Yes. “HT” (heat‑treated) pallets are safe for gardening because they are sterilized without chemicals.
Q2: How deep should the soil be for most flower varieties?
A: A depth of 8‑12 in works for most annuals and perennials. Deeper‑rooted plants (e.g., daylilies) may need 12‑18 in, so adjust the pallet height accordingly.
Q3: My pallet has a lot of nails—should I still use it?
A: Remove all nails and staples before construction. If removal is excessive, consider sourcing a cleaner pallet to save time.
Q4: Do I need a liner, or can I just fill the pallet directly with soil?
A: A liner (landscape fabric) is highly recommended. It prevents soil from escaping through gaps, improves drainage, and extends the life of the wood.
Q5: Can I paint the pallet with regular indoor paint?
A: Avoid indoor‑only paints, as they may not withstand UV exposure or moisture. Choose an exterior‑grade, low‑VOC paint or a clear sealant designed for outdoor wood.
Q6: How much weight can a standard pallet frame support?
A: A well‑constructed pallet bed can hold up to 150 lb of moist soil per cubic foot. Reinforce with crossbars if you plan to use heavy potting mixes or large containers.
Q7: Is it okay to place the pallet bed directly on grass?
A: Yes, but consider laying a layer of weed barrier fabric underneath the pallet to prevent grass roots from intruding and to improve stability.
Q8: What if I want to move the pallet bed later?
A: Build the frame with removable screws rather than nails. This lets you disassemble and re‑assemble the bed in a new location.
Final Thoughts
Transforming a simple wooden pallet into a thriving flower bed is a rewarding project that blends creativity, sustainability, and practical gardening. By following this guide, you will not only save money but also gain a deeper connection to the materials you repurpose and the plants you nurture.
Take a moment to assess the pallets you have access to, sketch a layout that fits your outdoor space, and gather the tools listed above. Within a weekend, your backyard—or balcony—will boast a rustic, eye‑catching garden that invites pollinators, brightens your view, and proves that great design doesn’t always require a big budget.
Happy building, and enjoy the blossoms!