Build a Wood‑Pallet Fort: The Complete DIY Guide
When you picture a backyard hideout, a treehouse, or a play‑room for the kids, a wood‑pallet fort often pops up as the most accessible, budget‑friendly option. Pallets are everywhere—on loading docks, in grocery stores, even in demolition sites—yet most people see them as mere shipping platforms. With a little imagination, a handful of tools, and a solid plan, you can transform a stack of pallets into a sturdy, stylish fort that will become the neighborhood’s go‑to adventure spot.
Below you’ll find an end‑to‑end, step‑by‑step guide written for you, the DIY enthusiast who wants to build a safe, functional, and eye‑catching wooden fort. We’ll cover everything from material selection and cost estimation to safety tips, finishing touches, and a handy FAQ to troubleshoot common problems.
1. Why Choose a Pallet Fort?
| Benefit | How It Helps You |
|---|---|
| Low Cost | Pallets are often free or cheap. You can usually pick them up from local businesses, saving you hundreds of dollars compared with lumber. |
| Eco‑Friendly | Re‑using pallets keeps wood out of landfills and reduces demand for new timber. |
| Modular Design | Pallets are designed to be stacked; you can easily add, remove, or re‑configure sections as your needs change. |
| Speed | With pre‑cut boards and uniform dimensions, construction time is dramatically reduced. |
| Customizable | Paint, stain, or add accessories (windows, ladders, shelves) to match your aesthetic. |
If you’re looking for a weekend project that yields a functional play space, a storage shed, or even a cozy reading nook, a pallet fort hits all the right notes.
2. Planning Your Fort
2.1 Choose a Location
- Flat Ground – A level surface prevents wobbling and makes anchoring easier.
- Clearance – Keep at least 3 ft of space around the fort for safe entry/exit.
- Sun & Shade – Pick a spot that gets morning sun but some afternoon shade, especially if kids will be inside.
2.2 Determine Size
Think about who will use the fort and what activities will happen inside. A common footprint for a children’s play fort is 8 ft × 6 ft with a height of 6 ft. Larger families or multi‑purpose forts can go up to 12 ft × 10 ft.
2.3 Sketch a Simple Blueprint
Even a rough hand‑drawn plan helps you visualize wall placement, door openings, and where the roof will sit. Mark:
- Floor frame (how many pallets needed)
- Wall sections (full pallets, half‑pallets, or cut‑to‑size boards)
- Roof style (flat, sloped, or gabled)
3. Materials & Tools
Below is a typical bill‑of‑materials for a 8 ft × 6 ft × 6 ft fort. Adjust quantities if you’re scaling up or down.
| Item | Qty (approx.) | Typical Cost* | Notes |
|---|---|---|---|
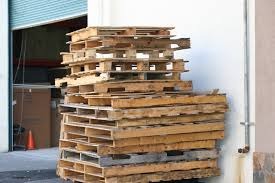
| Standard 48 in × 40 in pallets (4 ft × 3 ft) | 12 | $0–$15 per pallet (often free) | Look for pallets stamped “HT” (heat‑treated) – safer than chemically treated “MB”. |
| 2×4 lumber, 8 ft (for reinforcement) | 10 | $4 each | Use #2 grade. |
| 2×6 lumber, 8 ft (roof rafters) | 6 | $6 each | Optional for a sloped roof. |
| Deck screws, 3 in. | 5 lb | $8 | Rust‑resistant (galvanized). |
| Wood glue | 1 bottle (8 oz) | $6 | Adds extra strength at joints. |
| Exterior‑grade paint or stain | 1 gal | $20–$30 | Choose a non‑toxic paint for kids. |
| Sandpaper (80‑grit) | 1 pack | $5 | For smoothing splinters. |
| Safety goggles, gloves | 1 set | $15 | Personal protective equipment. |
| Drill + socket set | 1 set | $45 (if you don’t own) | Power drill with screwdriver bits. |
| Saw (circular or hand) | 1 | $30 (if you don’t own) | For cutting pallets and lumber. |
| Total Estimated Cost | — | ~$150‑$250 | Depends on what you already own; pallets can be free. |
*Prices are based on U.S. 2025 market averages and will vary by region.
3.1 Optional Extras
- Plywood panels for interior walls or a floor finish.
- Weather‑proofing sealant if the fort will stay outdoors year‑round.
- LED strip lights for interior illumination.
4. Construction Steps
Below is a timeline broken into phases, with estimated time for an average DIYer.
| Phase | Tasks | Approx. Time |
|---|---|---|
| A – Site Prep | Clear area, level ground, lay a weed‑barrier fabric. | 30 min |
| B – Pallet Conditioning | Remove nails, sand rough edges, apply wood glue on joints. | 1 hr |
| C – Floor Framework | Arrange 3 pallets side‑by‑side (8 ft × 12 ft) → cut to 6 ft length; reinforce with 2×4 joists. | 1 hr |
| D – Wall Construction | Stand pallets vertically, secure with screws and 2×4 studs; cut door opening. | 2 hr |
| E – Roof Installation | Lay 2×6 rafters, attach a flat pallet or plywood sheet; add a slight pitch if desired. | 1.5 hr |
| F – Finishing | Sand splinters, paint/stain, install a latch, add decorative elements. | 2 hr |
| G – Safety Check | Verify all screws are tight, test stability, install corner brackets. | 30 min |
| Total | — | ~8 hrs (one weekend) |
Now let’s walk through each phase in detail.
4.1 Site Preparation
- Clear the ground of rocks, sticks, and debris.
- Level the area using a shovel and a long straight board. Uneven ground leads to rocking walls.
- Lay a weed‑barrier fabric (optional but recommended) to keep moisture out of the wood.
4.2 Pallet Conditioning
- Safety first: Wear goggles and gloves.
- Remove all nails and staples with a pry bar or nail puller. Discard or save for later use.
- Sand rough edges using 80‑grit sandpaper; focus on where kids will touch.
- Treat the wood with a non‑toxic exterior sealant if the fort will stay outdoors for long periods.
4.3 Building the Floor
- Arrange pallets side‑by‑side to cover your desired footprint (e.g., three pallets for an 8 ft × 12 ft floor).
- Cut excess length if needed. A circular saw with a fine‑tooth blade works best.
- Add a 2×4 frame beneath the pallets: lay joists 16 in apart, screw them to the pallet’s top board. This prevents sagging and provides a solid anchor for walls.
4.4 Erecting the Walls
- Stand pallets upright at the edges of the floor. Fasten each to the floor joists with 3‑in. deck screws (two per joist).
- Reinforce corners by adding a vertical 2×4 stud inside each corner; screw through the pallet into the stud.
- Cut a door opening (≈3 ft × 5 ft) using a reciprocating saw. Add a simple wooden latch or a pre‑made door hinge for a swinging door.
Tip: If you want windows, cut 12‑in squares near the top of the wall and cover them with clear acrylic sheets or leave them open for ventilation.
4.5 Roof Construction
- Flat Roof (simplest): Lay a single pallet across the top of the walls, securing it with screws into the top plates of each wall.
- Sloped Roof (better drainage): Cut two 2×6 rafters to form a simple gable; attach them to the top of the front and back walls, then lay a plywood sheet on top, securing with screws.
Add a drip edge (a strip of metal) along the lower edge to divert rainwater away from the walls.
4.6 Finishing Touches
- Paint or stain the entire structure. Use low‑VOC (volatile organic compounds) paint for indoor air quality.
- Add interior features like a low bench (cut a pallet on its side), shelves, or a rope ladder.
- Install a lockable latch on the door for safety.
- Decorate with whimsical elements—bunting, fabric curtains, or fairy lights.
4.7 Safety Inspection
- Check all fasteners for tightness.
- Verify stability by gently rocking the fort; there should be no wobble.
- Secure the fort to the ground if you reside in a windy area—drive metal stakes through the base and anchor with earth or concrete.
- Cover sharp edges with sanded wood or edge guards.
5. Maintenance & Longevity
| Maintenance Item | Frequency | How to Perform |
|---|---|---|
| Re‑apply sealant/paint | Annually (or after heavy rain) | Lightly sand, clean, then repaint or reseal. |
| Inspect screws & joints | Every 6 months | Tighten loose screws, replace any that are corroded. |
| Check for rot or insect damage | Yearly | Look for soft wood, holes, or sawdust; replace affected boards. |
| Clean interior | As needed | Vacuum or sweep; wipe down surfaces with mild soap. |
A well‑maintained pallet fort can last 5–10 years outdoors, and even longer if kept in a covered area.
6. Frequently Asked Questions
| Question | Answer |
|---|---|
| Do I need a building permit? | Most municipalities consider a pallet fort a “minor structure” under 100 sq ft, so a permit isn’t required. However, check local zoning laws, especially if you’re building a larger, permanent shed. |
| Can I use chemically treated pallets? | Avoid “MB” (methyl bromide) treated pallets for indoor or children’s use. Heat‑treated (“HT”) pallets are safe. If you’re unsure, wash the pallets and let them dry before use. |
| How many pallets will I need for a 10 ft × 10 ft fort? | Rough estimate: 4 pallets for the floor (10 ft × 8 ft each), plus 8–10 pallets for walls (vertical orientation). Add 2–3 pallets for the roof. Total: 15–17 pallets. |
| What if the pallets are of uneven size? | Measure each pallet before purchase. Trim the longer boards to match a standard size (48 in × 40 in) using a circular saw. |
| Can I make the fort wheelchair‑accessible? | Yes—design a ramp with a gentle 1:12 slope (1 in rise per 12 in run) and ensure door width ≥ 32 in. Reinforce the floor and use thicker joists for added strength. |
| Is the fort fire‑safe? | Treat the wood with a fire‑retardant spray if the fort will be near open flames (e.g., campfires). Keep candles or heaters at a safe distance. |
| How do I prevent insects from nesting inside? | Seal all gaps, use a non‑toxic insect repellent spray, and keep the interior dry. Adding a thin layer of sand under the floor can deter termites. |
| Can I add electricity (lights, outlets)? | Yes, but run all wiring through a conduit and use outdoor‑rated GFCI outlets. If you’re not comfortable with electrical work, hire a licensed electrician. |
| What’s the best way to transport pallets to my site? | Use a small utility truck or a trailer. Many pallets weigh 40‑70 lb, so a dolly can help for short distances. |
7. Final Thoughts – Your Fort Awaits
You now have everything you need to turn a stack of humble wood pallets into a personal haven—whether it’s a secret clubhouse for the kids, a rustic storage shed, or a breezy summer lounge for you. The process is straightforward, the budget friendly, and the satisfaction priceless.
Remember: plan first, work safely, and finish with a splash of personality. Once the paint dries and the first laugh echoes inside, you’ll realize that the true value of a pallet fort isn’t measured in dollars—it’s measured in the memories you’ll create within its walls.
So gather those pallets, roll up your sleeves, and start building. Your fort is waiting to be imagined, constructed, and lived in. Happy building!