Build Your Own Wood‑Pallet Garage: A Step‑by‑Step Guide
If you’ve ever stared at a stack of reclaimed pallets and imagined a sturdy, budget‑friendly shelter for your car, tools, or garden equipment, you’re not alone. Wood‑pallet garages have exploded in popularity because they turn otherwise waste material into a functional structure with minimal cost and a surprisingly sleek look.
In this post you’ll learn exactly how to design, source, and construct a wooden‑pallet garage that meets local building codes, protects your assets, and looks great on any driveway. We’ll walk through every major decision, provide handy tables for quick reference, and finish with a concise FAQ so you can troubleshoot any hiccup that arises.
1. Why Choose a Pallet Garage?
| Benefit | What It Means for You | Example |
|---|---|---|
| Low cost | Pallets are often free or cheap from warehouses, retailers, or Craigslist. | A 12‑ft x 20‑ft garage can be built for under $1,200 in materials. |
| Eco‑friendly | Reusing pallets reduces waste and carbon footprint. | One reclaimed pallet saves ~30 board feet of new lumber. |
| Quick assembly | Pre‑cut, uniform boards speed up framing. | Most DIYers finish the structure in 2–3 weekend days. |
| Customizable | You can add insulation, siding, or a solar roof panel later. | Turn the same frame into a workshop by adding drywall. |
| Aesthetic appeal | Rustic, industrial look that blends with modern homes. | Pair with metal roofing for a sleek contrast. |
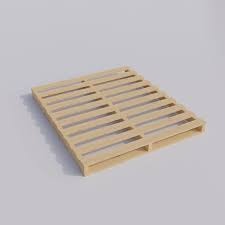
2. Understanding Wood Pallets
Before you start hammering, it’s crucial to know which pallets are suitable for structural use. Not all pallets are created equal—some are flimsy “block pallets” meant only for light storage, while others are built to bear heavy loads.
2.1 Common Pallet Sizes & Load Capacities
| Pallet Type | Nominal Dimensions (L × W) | Deck Board Thickness | Typical Load Rating* |
|---|---|---|---|
| Standard 48‑in (Euro) | 48″ × 40″ | ½” (12 mm) | 1,500 lb (uniform) |
| 42‑in (Australian) | 42″ × 36″ | ¾” (19 mm) | 2,000 lb |
| 48‑in Heavy‑Duty | 48″ × 48″ | 1” (25 mm) | 3,500 lb |
| 36‑in Light‑Duty | 36″ × 30″ | ½” (12 mm) | 800 lb |
*Ratings are approximate; always verify with the supplier and look for the “HT” (heat‑treated) stamp which indicates compliance with ISPM 15 standards for treated wood.
What you should do:
- Inspect for damage – cracks, rot, or broken boards compromise strength.
- Check the stamp – “HT” (heat‑treated) or “KD” (kiln‑dried) are safe for outdoor use.
- Prefer uniform boards – consistent thickness simplifies framing.
3. Planning Your Pallet Garage
A successful build starts with a solid plan. Below is a basic checklist and a cost‑estimate table for a 12 ft × 20 ft single‑car garage (approximately 240 sq ft). Adjust dimensions to suit your vehicle or storage needs.
3.1 Materials Checklist
| Item | Quantity (approx.) | Source | Estimated Cost (USD) |
|---|---|---|---|
| Reclaimed pallets (standard 48‑in, HT) | 30–35 pallets (for walls, roof, floor joists) | Local warehouses, Craigslist | $0–$150 (free if sourced) |
| 2×4 lumber (for reinforcement) | 40 ft (8‑ft studs) | Home‑center | $120 |
| Pressure‑treated 2×6 floor joists | 10 pieces (12‑ft) | Home‑center | $150 |
| Metal roofing panels (corrugated) | 5 panels (12‑ft × 3‑ft) | Building supply | $200 |
| Concrete deck blocks | 8 blocks (foundation) | Home‑center | $60 |
| Screws & nails (galvanized) | 10 lb | Home‑center | $30 |
| Door kit (prefab wooden door) | 1 (6‑ft × 7‑ft) | Home‑center | $250 |
| Sealant & paint (weather‑proof) | 1 gal each | Home‑center | $70 |
| Safety gear (gloves, goggles) | 1 set | Home‑center | $20 |
| Total Approx. Cost | – | – | $1,050 |
Tip: If you have a workshop with a table saw, you can cut pallets to exact lengths, reducing the need for extra lumber.
3.2 Layout Sketch (quick reference)
+-------------------------- 20 ft ---------------------------+
|                                                          |
|                12 ft width (wall)                        |
|                                                          |
|   +------------------- 12 ft -------------------+        |
|   |                                            |        |
|   |                Garage Bay                 |        |
|   |                                            |        |
|   +--------------------------------------------+        |
|                                                          |
+----------------------------------------------------------+
4. Building Process – From Foundation to Finish
Below is a concise, day‑by‑day timeline. Feel free to compress or stretch each phase based on your schedule and experience.
| Day | Task | Key Tips |
|---|---|---|
| Day 1 | Site Preparation & Foundation – Level ground, place 8 concrete deck blocks in a rectangle (12 ft × 20 ft). | Use a string line to keep blocks perfectly aligned. |
| Day 2 | Floor Joists – Lay pressure‑treated 2×6s across the blocks, spaced 16 in on center (OC). Secure with metal brackets. | Apply a waterproof membrane (tarps) under joists to prevent moisture. |
| Day 3‑4 | Wall Framing – Stand pallets vertically on the joists to form sidewalls. Reinforce corners with 2×4 studs and double‑nail every 6 in. | Keep the grain of the pallet boards facing outward for a uniform look. |
| Day 5 | Roof Structure – Lay pallets flat across the top, overlapping the side walls by at least 6 in. Secure with long carriage bolts. | Insert a 2×4 ridge beam at the center for extra rigidity. |
| Day 6 | Metal Roofing Installation – Screw corrugated panels to the roof pallets, starting at the lower edge and working up. Overlap panels per manufacturer instructions. | Seal all seams with roofing caulk to prevent leaks. |
| Day 7 | Door Installation – Fit the pre‑fabricated door into a pallet‑framed opening. Reinforce the header with a double 2×6 beam. | Install a heavy‑duty latch or a lock for security. |
| Day 8 | Finishing Touches – Apply exterior wood sealant to all exposed pallet surfaces, then paint if desired. Install gutters if necessary. | Paint on a dry day (no rain forecast for 24 h). |
| Day 9 | Inspection & Clean‑up – Check all fasteners, confirm levelness, and tidy the site. | Keep a checklist (see below) to verify each component. |
4.1 Quick Inspection Checklist
- Foundation blocks level and securely placed.
- Floor joists spaced correctly and anchored.
- All pallet walls are plumb and nailed every 6 in.
- Roof panels properly overlapped and sealed.
- Door operates smoothly, latch locks.
- Exterior sealant applied uniformly.
5. Safety and Building‑Code Considerations
- Load-bearing walls: Even though pallets are strong, treat them as non‑structural elements. Reinforce corners and seams with standard lumber.
- Moisture protection: Pallet wood is typically untreated on the interior side. Apply a vapor barrier under the floor and seal all exterior surfaces.
- Local permits: Many municipalities categorize a garage under “Accessory Structure.” Verify setbacks, height limits, and any required permits before you start.
- Personal safety: Wear gloves (splinters are common), safety glasses, and hearing protection when using power tools.
6. Pros & Cons of a Pallet Garage
| Aspect | Advantages | Potential Drawbacks |
|---|---|---|
| Cost | Minimal material expense; often free pallets. | May require extra lumber for reinforcement, raising cost slightly. |
| Construction Time | Simple geometry; quick assembly. | Requires sorting, cleaning, and possibly de‑nailing pallets. |
| Durability | Pallet wood is dense; with sealant it resists rot. | If pallets are low‑grade, they can warp or split over time. |
| Insulation | Easy to add foam board or batt insulation later. | Raw pallet walls are not thermally efficient without upgrades. |
| Aesthetics | Rustic, reclaimed‑wood appearance. | May not suit all neighborhood styles; may need cladding for a polished look. |
7. Maintenance Tips
- Annual Inspection: Look for loose nails, signs of rot, or roof panel corrosion. Tighten or replace as needed.
- Re‑seal Every 2–3 Years: Weather‑proofing paint or clear sealant protects against UV and moisture.
- Pest Control: Pallet wood can attract insects. Use a borate spray annually to deter termites and carpenter ants.
- Clean Gutters: If you installed a gutter system, keep it clear to prevent water damage to the roof structure.
8. Frequently Asked Questions
| Question | Answer |
|---|---|
| Do I need a building permit? | Most cities require a permit for any structure larger than 100 sq ft or over 8 ft high. Check with your local planning department; a simple garage often qualifies for a “minor‑structure” permit. |
| Can I use pallets that have been painted or stained? | Yes, but inspect the surface for flaking paint that could contain lead (common in older pallets). Sand and treat any hazardous coating before use. |
| How do I make the garage more insulated? | Attach rigid foam board to the interior side of the pallet walls, then cover with drywall or plywood. Add weatherstripping around the door. |
| What if I can’t find enough pallets? | Combine pallets with standard dimensional lumber. The pallets provide the outer “skin,” while the lumber supplies the structural skeleton. |
| Is a pallet garage safe for storing a vehicle? | When built to code, reinforced with 2×4 studs and a solid roof, it can safely house a standard passenger car. Always verify the foundation can support the vehicle’s weight (≈ 3,500 lb for an average sedan). |
| Can I add windows? | Yes—cut openings in the pallet walls and install double‑glazed windows with a vinyl or aluminum frame. Reinforce the surrounding pallet with a 2×4 header. |
| What tools do I absolutely need? | Circular saw (or handsaw), drill/impact driver, measuring tape, level, framing square, hammer, and a nail gun (optional but speeds up work). |
| How long will the garage last? | With proper sealing and annual maintenance, a pallet garage can serve you for 10‑15 years, comparable to a traditional wood‑frame structure. |
9. Take the First Step Today
You now have a clear roadmap: source quality pallets, plan a budget‑friendly material list, follow a step‑by‑step construction schedule, and keep the garage maintained for years to come. The biggest barrier is often simply getting started—so head to the nearest warehouse, ask for “HT‑marked pallets,” and begin sketching your design.
A wood‑pallet garage isn’t just a cheap shelter; it’s a statement that you value sustainability, ingenuity, and hands‑on craftsmanship. Build it, enjoy it, and maybe even inspire your neighbors to give their pallets a second life.
Happy building!