DIY Wood‑Pallet Patio Furniture Drawings: From Sketch to Finished Piece
Transform your backyard, deck, or balcony into a stylish, budget‑friendly oasis using reclaimed pallets. This step‑by‑step guide walks you through the entire design process—starting with simple drawings, moving to material selection, and ending with a set of sturdy, weather‑ready patio pieces you can be proud of.
1. Why Start with a Drawing?
Before you swing a hammer or fire up the circular saw, a quick sketch does more than just “look pretty.”
| Benefit | How It Helps You |
|---|---|
| Clarity | Turns vague ideas into concrete dimensions, so you know exactly how many pallets, screws, and boards you need. |
| Safety | Highlights structural weak points (over‑hangs, unsupported spans) before you cut any wood. |
| Cost Control | Allows you to compare different material options and choose the most economical path. |
| Customization | Easy to tweak style elements (armrests, backrests, cup‑holder slots) without re‑building. |
A sketch doesn’t have to be a masterpiece—just a clear, to‑scale representation of the final piece. In the sections that follow, you’ll see printable templates, dimension tables, and a handful of design ideas that you can adapt to any space.
2. Getting Started: Tools & Materials Checklist
Before you sketch, gather the essentials. Below is a concise table that covers everything you’ll need for a typical three‑piece patio set (two chairs + coffee table). Feel free to add or subtract items based on the size of your project.
| Category | Item | Recommended Specs | Approx. Cost* |
|---|---|---|---|
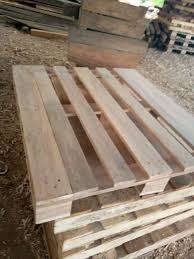
| Pallets | Reclaimed wooden pallets (clean, heat‑treated) | 48″ × 40″, 1‑inch thick slats | $5–$10 each |
| Fasteners | Deck screws (galvanized) | 2.5 – 3 in., #8‑10 | $0.10 each |
| Tools | Circular saw or hand saw | 7‑inch blade for 2‑in. wood | — |
| Power drill + driver bits | Variable speed | — | |
| Sandpaper or orbital sander | 80‑grit → 220‑grit | $15 | |
| Measuring tape, carpenter’s square | 25‑ft, metal | $10 | |
| Finishes | Outdoor wood stain or sealant | UV‑resistant, water‑proof | $20–$30 per quart |
| Paintbrush or roller | Synthetic bristles | $8 | |
| Optional | Outdoor cushions | Weather‑proof fabric | $30–$50 each |
| Caster wheels (for movable coffee table) | 2‑inch, lockable | $12 |
*Prices are approximate (U.S.) and will vary by region and retailer.
Tip: If you can’t find “clean” pallets, ask local retailers for “heat‑treated” pallets (marked “HT”). They’re less likely to carry pests and will require less cleaning.
3. Sketching Your First Piece – The Pallet Coffee Table
3.1. Choose a Style
There are three classic archetypes that work beautifully with pallet wood:
- Industrial Box – A simple rectangular box with a raw, exposed‑edge look.
- Mid‑Century Modern – Slightly tapered legs, rounded corners, and a thin top slab.
- Rustic Farmhouse – A thick, reclaimed‑look top with a lower shelf for planters.
For this tutorial, we’ll adopt the Industrial Box because it uses the pallet’s natural dimensions almost unchanged, minimizing cuts and waste.
3.2. Draft a Scaled Drawing
- Grab a grid paper (or use a free online drawing tool like SketchUp or Planner 5D).
- Mark the outer perimeter – typical coffee‑table dimensions: 48″ × 30″ (length × width).
- Add the height – 18″ is comfortable for a seated height.
- Indicate the pallet layout:
- Two pallets side‑by‑side for the top (48″ × 40″ pallet clipped to 30″ width).
- One pallet sliced into a 30″ × 30″ square for the lower shelf.
- Four 2‑inch‑wide slats for the legs (cut from pallet side‑boards).
Your final sketch should look something like this (ASCII representation for quick reference):
+------------------------------+
|            TOP               |
|  (2 pallets – 48" x 30")     |
+------------------------------+
|          LEG (4 pcs)         |
|   |      |      |      |    |
|   |      |      |      |    |
|   +----------------------+   |
|          SHELF (1 pallet)   |
+------------------------------+
3.3. Translate Sketch to a Cut List
| Part | Quantity | Source (pallet) | Cut Length | Cut Width | Thickness |
|---|---|---|---|---|---|
| Table top (two pieces) | 2 | Pallet 1 | 48″ | 15″ | 1.0″ |
| Lower shelf | 1 | Pallet 2 | 30″ | 30″ | 1.0″ |
| Leg boards | 4 | Pallet 3 (side rails) | 18″ | 2″ | 1.0″ |
| Cross braces (optional) | 2 | Pallet 4 | 30″ | 2″ | 1.0″ |
| Total pallets needed | — | — | — | — | ≈ 4 |
Pro tip: Add 1/8″ to each dimension to accommodate saw blade kerf (the thin strip of wood removed by the blade).
4. From Drawing to Reality – Construction Steps
Below is a concise, numbered workflow that mirrors the order of operations you’ll see in most DIY tutorials. Follow each step, double‑checking measurements against your drawing before you cut.
- Prepare the pallets – Remove any broken slats, strip away nails, and sand the surfaces lightly.
- Mark your cuts – Transfer the measurements from the cut list onto the pallet boards using a pencil and a straightedge.
- Make the cuts – A circular saw with a fine‑tooth blade (24‑tpi) gives the cleanest edges.
- Dry‑fit the frame – Assemble the legs, lower shelf, and cross braces without any fasteners to confirm alignment.
- Pre‑drill holes – Use a 1/8″ drill bit to prevent wood splitting, especially near the ends of the slats.
- Secure with screws – For a strong joint, use galvanized deck screws: two per leg‑to‑shelf connection, four per top‑to‑leg joint.
- Sand the entire piece – Start with 80‑grit, finish with 220‑grit for a smooth surface that accepts stain evenly.
- Apply finish – Brush on an outdoor wood stain (e.g., Minwax Helmsman). Let dry 24 hrs, then add a clear polyurethane sealer for extra weather protection.
- Add optional accessories – Install caster wheels under the lower shelf for easy movement, or attach a rope handle to the side for a rustic pull‑out tray.
4.1. Time Estimate
| Phase | Approx. Duration |
|---|---|
| Pallet preparation | 45 min |
| Cutting & shaping | 1 hr 20 min |
| Assembly (dry‑fit + drilling) | 45 min |
| Sanding | 30 min |
| Staining & sealing (dry time excluded) | 20 min |
| Total active time | ~4 hrs (plus 24‑48 hrs for drying) |
5. Designing Two Matching Pallet Chairs
A cohesive patio set looks best when the pieces share design cues. Below is a quick reference for two single‑seat chairs that complement the coffee table.
| Feature | Description |
|---|---|
| Seat Width | 18″ |
| Seat Depth | 15″ |
| Backrest Height | 22″ |
| Leg Height | 18″ (same as table) |
| Pallet Usage | 1 pallet for seat, 1 pallet for backrest, 2 pallets for leg frames |
| Optional Add‑On | Small cushion (12″ × 12″) for comfort |
Sketch Tip
Draw a side elevation of the chair, then overlay a top‑down view. Keep the backrest angle around 100–110° for ergonomic support.
Cut List (per chair)
| Part | Qty | Size (L × W × T) |
|---|---|---|
| Seat slab | 1 | 18″ × 15″ × 1″ |
| Backrest slab | 1 | 18″ × 12″ × 1″ |
| Front legs | 2 | 18″ × 2″ × 1″ |
| Rear legs | 2 | 18″ × 2″ × 1″ |
| Support brace | 2 | 15″ × 2″ × 1″ |
The same construction steps (dry‑fit → pre‑drill → screw) apply.
6. Customizing Your Designs – Going Beyond the Basics
1. Add a Built‑In Magazine Rack
- Cut a shallow shelf (12″ × 4″ × 1″) and attach it beneath the coffee‑table top using L‑brackets.
2. Incorporate Planters
- Use a pallet slat to fashion a rectangular box (12″ × 12″ × 10″) that slots under the lower shelf. Line with a waterproof liner and fill with soil.
3. Play With Color
- If you love a pop of color, paint the legs a bold shade (e.g., teal or mustard) while keeping the top natural for contrast.
4. Create a Modular System
- Design each piece with a standard 18‑inch “module” height. This lets you stack or re‑arrange items (e.g., add a side table).
7. Frequently Asked Questions (FAQ)
| Question | Answer |
|---|---|
| Do I need to treat pallet wood for pests? | Most pallets are marked “HT” (heat‑treated) and are safe for indoor/outdoor use. If you’re unsure, sand the surface thoroughly, then apply a pesticide‑free sealant. |
| Can I use regular nails instead of screws? | Screws are recommended for outdoor furniture because they hold up better against humidity and wind. Nails may rust or loosen over time. |
| How many pallets are enough for a full 4‑piece set (2 chairs + table + side table)? | Typically 8–10 pallets. A 48″ × 40″ pallet provides roughly 2 sq ft of usable surface. Calculate total surface area first (see the cut‑list tables). |
| What’s the best way to protect the furniture from rain? | Apply a penetrating oil (e.g., teak oil) followed by a marine‑grade polyurethane. Reapply every 6–12 months, especially after heavy rain. |
| Can I paint the pallet wood instead of staining it? | Yes, but you must prime first with a rust‑inhibiting, oil‑based primer. Paint alone may peel if the wood expands/ contracts. |
| Do I need a permit to build patio furniture? | No, DIY furniture is considered personal property. Only permanent structures (e.g., built‑in decks) may need local code approval. |
| What if the pallet boards have different grain directions? | For structural parts (legs, braces) aim to cut boards with the grain running parallel to the load. For decorative surfaces, mixed grain is fine and adds visual interest. |
| How can I make the furniture lighter for moving? | Use hollow core slabs (cut a groove halfway through a board and glue a thin plywood insert) or replace solid legs with metal pipe frames. |
8. Final Thoughts
You’ve now walked through the whole journey—from a simple hand‑drawn plan to a polished set of patio pieces that cost a fraction of store‑bought alternatives. Remember:
- Start small. Master the coffee table before tackling a full set.
- Measure twice, cut once. Your drawings are the safety net that prevents costly mistakes.
- Embrace the imperfections. The rustic charm of pallet wood lies in its natural knots, nail holes, and weathered patina.
Take a photo of your finished set, share it on social media, and tag us with #PalletPatioDIY. We love seeing how you make the most of reclaimed wood—and we’re always happy to answer any follow‑up questions you may have.
Happy building, and enjoy the summer evenings on your very own pallet patio oasis!