DIY Wooden Pallet Dog Bed
Turn a humble shipping pallet into a cozy, Instagram‑worthy sleeping spot for your furry friend—without breaking the bank.
Why a Pallet Dog Bed?
| Feature | Traditional Dog Bed | DIY Pallet Bed |
|---|---|---|
| Cost | $50‑$150 (average) | $20‑$45 (pallet + accessories) |
| Durability | Fabric can tear, stuffing flattens | Solid wood, resistant to chewing & digging |
| Customization | Limited to manufacturer’s colors/sizes | Paint, stain, cushions, height, shape—tailor‑made |
| Eco‑Friendliness | Often made from virgin materials | Re‑uses reclaimed wood, reduces waste |
| Aesthetic | Standard pet‑store look | Rustic, farmhouse, modern—matches your décor |
If you’re looking for a budget‑friendly, sturdy, and stylish option—and you love a good DIY project—a wooden pallet dog bed is a win‑win. Below you’ll find everything you need to build one, from planning to finishing touches.
1. Planning Your Pallet Bed
1.1 Measure Your Dog
Before you cut, sand, or paint, measure the length from your dog’s nose to the tip of its tail and the width across its shoulders. Add 6–8 inches to each dimension for breathing room and movement. For example:
| Dog Size | Body Length (in) | Recommended Bed Size |
|---|---|---|
| Small (e.g., Chihuahua) | 12–16 | 20” × 12” |
| Medium (e.g., Beagle) | 18–22 | 28” × 18” |
| Large (e.g., Labrador) | 24–30 | 36” × 24” |
| Giant (e.g., Great Dane) | 32–38 | 48” × 30” |
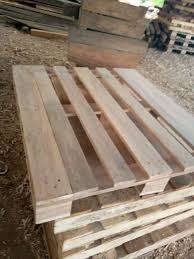
1.2 Choose the Right Pallet
Look for pallets that are heat‑treated (marked “HT”) rather than chemically treated (“MB” for methyl bromide). Heat‑treated pallets are safer for pets.
- Condition: Avoid pallets with splinters, rusted nails, or missing boards.
- Size: Most standard pallets measure 48” × 40” (≈ 1.2 m × 1 m). This works for most medium‑large dogs with a little trimming.
If you can’t find a perfect‑size pallet, you can combine two smaller pallets or cut one down to size.
2. Materials & Tools
| Item | Quantity | Why It Matters |
|---|---|---|
| Heat‑treated wooden pallet | 1 (or 2 smaller) | Base structure |
| Sandpaper (80‑grit & 120‑grit) | 1 pack each | Smooth sharp edges |
| Wood filler | Small tube | Fill nail holes, cracks |
| Exterior wood stain or paint | 1 qt | Protects wood, adds style |
| Clear polyurethane sealant | 1 qt | Water‑resistant finish |
| Cushion or memory foam | 1 (cut to size) | Comfort for your dog |
| Durable, washable cover (canvas or denim) | 1 | Removable, easy to clean |
| Screws (1½” wood screws) | ~30 | Secure joints |
| Drill & screwdriver bits | 1 set | Assemble & fasten |
| Circular saw or hand saw | 1 | Resize pallet if needed |
| Rubber mallet | 1 | Tap boards without splintering |
| Safety gear (gloves, goggles) | 1 set | Protect yourself |
Estimated total cost: $35‑$65, depending on what you already have on hand.
3. Step‑by‑Step Build Guide
3.1 Prep the Pallet
- Inspect & Clean – Remove any loose nails, staples, or debris. Use pliers to pull out protruding nails.
- Disassemble (optional) – If you want a slimmer profile, dismantle the pallet into individual boards using a pry bar and hammer, then re‑assemble in a “deck” style (see Figure A). For a quick build, you can keep it whole.
- Sand – Start with 80‑grit sandpaper on the top surface, especially where splinters exist. Finish with 120‑grit for a smoother feel.
- Fill Gaps – Apply wood filler to any visible cracks or nail holes. Let dry per manufacturer’s instructions, then sand smooth.
3.2 Cut to Size
- Measure the final bed dimensions from your table in Section 1.1.
- Mark the cut lines on the pallet using a pencil.
- Saw along the line, keeping the blade straight. If you’re using a hand saw, a steady rhythm helps avoid wobbling.
Tip: Cut a little larger than required; you can always sand down the edges later.
3.3 Build the Frame (Optional Upgrade)
If you want a raised edge to keep the cushion in place:
- Create a “lip” by cutting a second pallet board to the same length as your top surface.
- Attach it around the perimeter using 1½” wood screws (pre‑drill pilot holes to avoid splitting). Space screws every 6‑8 inches.
- Re‑sand any new cut edges.
3.4 Stain / Paint & Seal
- Stain (or paint) – Apply your chosen wood stain with a lint‑free cloth, moving with the grain. Let it soak for 5‑10 minutes, then wipe excess. Repeat for a richer color.
- Dry – Let sit 24 hours.
- Seal – Brush on a thin coat of clear polyurethane. Two coats give the best protection; sand lightly (220‑grit) between coats.
Safety note: Work in a well‑ventilated area and wear a mask when sanding or applying finishes.
3.5 Add the Cushion
- Cut the foam to the exact dimensions of the pallet top (plus any lip).
- Wrap it in a washable cover—preferably zip‑up canvas or denim for durability.
- Secure the cushion with Velcro strips or a few discreet screws (through the base, into the cushion) if you want it to stay put.
3.6 Final Touches
- Legs (optional): Attach 2‑inch wooden legs or metal brackets to the bottom if you want the bed slightly elevated off the floor (helps with cleaning).
- Label the underside with a small “dog safe” sticker for future reference.
- Place the bed in a quiet corner, let your pet sniff it, and watch them claim their new throne!
4. Maintenance & Longevity
| Maintenance Task | Frequency | How‑to |
|---|---|---|
| Vacuum / brush off debris | Weekly | Use a soft brush attachment to remove hair and dirt. |
| Wash cushion cover | Every 2–3 weeks (or as needed) | Machine wash on gentle cycle, tumble dry low. |
| Inspect for splinters or loose nails | Monthly | Run your hand over the surface; tighten any loose screws. |
| Re‑apply sealant | Every 12–18 months | Light sand, then a fresh coat of polyurethane to prevent moisture damage. |
By staying on top of these simple chores, your pallet bed can last 3–5 years—or longer if you’re diligent.
5. Creative Customizations
- Painted Paw Prints: Use stencils and non‑toxic acrylic paint for a playful design.
- LED Night Light: Attach a low‑voltage LED strip under the lip for a gentle glow.
- Seasonal Themes: Swap cushion covers for holiday motifs (plaid for winter, bright florals for spring).
- Name Plate: Carve or burn your dog’s name onto a small wooden tag and attach it to the front.
Frequently Asked Questions (FAQ)
| Question | Answer |
|---|---|
| Is a pallet safe for dogs? | Yes, as long as you use a heat‑treated pallet (look for “HT” stamps) and sand away any splinters. Avoid pallets marked “MB” (treated with methyl bromide) because the chemicals can be harmful. |
| Can I use a pallet that’s already painted? | You can, but it’s best to sand the old paint off and apply a fresh, pet‑safe finish. Some industrial paints contain volatile compounds that off‑gassing can irritate pets. |
| What if my dog chews the wood? | Most dogs don’t gnaw on solid wood, but if yours does, consider applying a non‑toxic wood sealant (e.g., water‑based polyurethane). You can also add a plastic liner on the underside to protect the wood. |
| How thick should the cushion be? | 2‑inch memory foam provides a good balance of support and softness for most breeds. Larger dogs may appreciate 3‑inch thickness for extra joint relief. |
| Do I need a separate waterproof layer? | The polyurethane sealant makes the wood water‑resistant, but if you expect frequent spills, place a thin waterproof mattress pad under the cushion for added protection. |
| Can I build a pallet bed without a saw? | Yes—buy a pallet already close to the right size or ask a local hardware store to cut it for you. You can also trim with a sturdy hand‑held utility knife for small adjustments. |
| What’s the best way to dispose of the old pallet? | If it’s still in good condition, consider donating to a community garden or a local shelter. Otherwise, check with your municipality’s recycling program for wood pallets. |
| Will the bed smell after finishing? | Allow the stain and sealant to cure for at least 24‑48 hours in a ventilated space. The odor will dissipate; a light sanding after the final coat can also help reduce lingering smells. |
6. Quick Recap Checklist
- Find a heat‑treated pallet (48” × 40” is ideal).
- Measure your dog and decide final bed dimensions.
- Gather tools: sandpaper, saw, drill, screwdriver, safety gear.
- Sand, fill, and cut the pallet to size.
- (Optional) Build a raised lip/frame.
- Stain/paint → let dry → seal with polyurethane.
- Cut foam cushion, add washable cover, secure.
- Add any optional legs or decorative touches.
- Place, enjoy, and schedule routine maintenance.
Final Thought
Creating a DIY wooden pallet dog bed is more than a cost‑saving hack—it’s a chance to craft a personalized, eco‑friendly sanctuary that reflects your style and cares for your canine companion. By following the steps above, you’ll have a sturdy, stylish, and snuggly spot that will earn tail‑wags for years to come. Happy building, and may your pup nap in comfort!