DIY Fence Built From Pallet Wood: A Rustic, Affordable, and Eco‑Friendly Upgrade
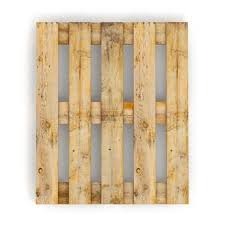
If you’ve ever walked past a loading dock and admired those rugged, weather‑worn pallets stacked high, you’ve probably wondered what could be done with them once they’re tossed aside. The answer is simple: turn them into a beautiful fence.
A pallet‑wood fence is the perfect blend of rustic charm, low cost, and sustainability. In this post, we’ll walk you through everything you need to know—why pallet wood works so well, how to design and build your own fence, and the little tricks that make the finished product look polished rather than “just recycled”.
1. Why Choose Pallet Wood for a Fence?
| Benefit | What It Means for You |
|---|---|
| Cost‑Effective | Pallets are often free (or cost a few dollars for a cleaned set). A typical 4‑ft × 8‑ft pallet can yield roughly 8 sq ft of usable board. |
| Sustainable | You’re re‑using a material that would otherwise end up in a landfill, reducing your carbon footprint. |
| Rugged Aesthetic | The weathered texture, nail holes, and reclaimed look give an instant “farmhouse” vibe. |
| Easy to Modify | Pallets are already cut to standard dimensions (usually 48 × 40 in). You can stack, cut, and screw them together without a lot of measuring. |
| Lightweight Yet Strong | Pine or hardwood pallets are strong enough for an 8‑ft tall privacy fence when properly braced. |
| DIY Friendly | No special tools beyond a circular saw, drill, and a few safety items are needed. |
2. Planning Your Pallet Fence
a. Determine the Purpose
- Privacy – Fill the gaps with additional boards or add a horizontal slat “screen”.
- Boundary – Keep gaps wider; you may simply stack pallets side‑by‑side.
- Decoration – Use only a few pallets as accent panels along an existing fence.
b. Measure the Area
- Sketch a quick plan (paper, phone app, or a simple spreadsheet).
- Note post spacing (typically 6–8 ft apart).
c. Check Local Regulations
- Some municipalities have height limits (usually 6 ft for residential fences).
- Verify that pallets are allowed in your zoning district.
d. Source Pallets Wisely
- Look for pallets that are heat‑treated (HT), not chemically treated (e.g., “MB” or “KD”). HT pallets are safer for outdoor use.
- Inspect for broken boards, large splinters, or excessive rust.
3. Materials & Tools Checklist
| Item | Suggested Quantity (for a 30‑ft long, 4‑ft high fence) |
|---|---|
| Pallets (4 × 8 ft) | 10–12 (depending on layout) |
| Pressure‑treated posts (4 × 4 in) | 5 (6‑ft spacing) |
| Concrete mix (quick‑set) | 5 bags (½ cu ft per post) |
| Galvanized deck screws (3 in) | 5 lb box |
| Exterior‑grade wood glue (optional) | 1 qt |
| Gravel (for post footings) | 1 cu ft |
| Saw (circular or miter) | – |
| Drill/driver with screwdriver bits | – |
| Hammer & nails (optional) | – |
| Safety gear (gloves, goggles, ear protection) | – |
| Paint, stain, or sealant (optional) | 1‑2 gal depending on finish |
| Brackets or metal post anchors (optional) | 5 sets |
4. Step‑by‑Step Build Guide
Pro tip: Work in a dry, well‑ventilated area and wear a dust mask when sanding or cutting.
Step 1: Prepare the Pallets
- Clean – Brush off dirt, then wipe with a mild soap solution. Let dry.
- Disassemble (optional) – If you prefer a smoother surface, take the boards apart with a pry bar and a reciprocating saw, then re‑assemble as you like.
- Trim – Cut any uneven boards to a uniform length (e.g., 48 in).
Step 2: Set the Posts
- Mark post locations along the line, spacing 6–8 ft apart.
- Dig holes 2 ft deep (or 1/3 the post length) and 8‑in wide.
- Add 6 in of gravel, then stand the post, check for plumb.
- Backfill with concrete, taper the top, and let cure 24–48 hrs.
Step 3: Attach the Pallet Panels
- Lay pallets flat against the posts. For a 4‑ft high fence, you’ll need two pallets stacked vertically (or one pallet turned on its side).
- Secure with screws – Drive 3‑in deck screws through the pallet’s side boards into the post, spacing every 12 in.
- Stagger joints (like bricklaying) for extra strength and a more attractive look.
Step 4: Reinforce the Structure
- Add a horizontal cross‑brace (2×4) between the upper and lower pallets on each post.
- For longer runs, install intermediate vertical braces (½‑in steel brackets) every 4 ft.
Step 5: Finish the Fence
- Sand any rough edges or splinters (120‑grit).
- Apply a weather‑proof sealant, stain, or paint. Transparent sealants let the rustic grain shine; a dark stain gives a more uniform appearance.
5. Design Ideas to Elevate the Look
| Style | Description | How to Achieve |
|---|---|---|
| Rustic Farmhouse | Raw pallet texture with a distressed whitewash. | Use a diluted latex paint (1:1 with water) and sand lightly after drying. |
| Modern Linear | Pallets turned on edge, creating vertical slats with uniform spacing. | Cut pallets into 2‑in strips, attach vertically with hidden brackets. |
| Mixed Media | Combine pallet wood with reclaimed metal or decorative lattice. | Install a metal trellis behind pallet panels for climbing vines. |
| Partial Privacy | Leave gaps on the bottom half for airflow, solid panel on top for privacy. | Stack 1 pallet for a low screen, then add a second pallet with boards spaced 1‑2 in apart. |
| Green Wall | Attach garden planters onto the pallet fence, allowing herbs and succulents to grow. | Use wooden crates or build shallow troughs from leftover pallet boards. |
6. Maintenance Tips
| Issue | Prevention / Solution |
|---|---|
| Rot | Use pressure‑treated posts and apply a clear sealant to all exposed wood at least once a year. |
| Splinters | Sand rough spots after each season; consider covering the fence with a breathable fabric during winter. |
| Insect Damage | Choose HT pallets and treat with a non‑toxic borate spray if you notice ant or termite activity. |
| Warping | Keep the fence upright and avoid stacking pallets directly on wet ground—use a thin gravel base under each panel. |
7. Budget Snapshot (Average U.S. Prices, 2025)
| Item | Approx. Cost |
|---|---|
| Pallets (free, plus transport) | $0–$30 |
| 4 × 4 Posts (5 pcs) | $40 |
| Concrete mix (5 bags) | $30 |
| Screws & fasteners | $15 |
| Sealant or stain (1 gal) | $30 |
| Tools (if you need to rent) | $50 |
| Total | $165–$215 |
Compared to a commercial wood fence that can easily exceed $1,200 for the same length, you’re saving upwards of 80 %.
8. Common Mistakes & How to Avoid Them
| Mistake | How to Fix It |
|---|---|
| Using chemically‑treated pallets | Always look for the “HT” stamp (heat‑treated). Avoid pallets marked “MB” (methyl bromide) or “KD” (kiln‑dried, may contain chemicals). |
| Skipping post concrete | Posts will wobble and eventually rot at the base. Use at least 6 in of concrete for stability. |
| Leaving gaps too large | For privacy, stagger the pallets and add extra boards or a second layer. |
| Neglecting safety | Pallet wood can contain splinters or hidden nails. Wear gloves, goggles, and a dust mask while cutting. |
| Painting over dirty wood | Clean the surface first; otherwise paint will peel quickly. |
9. Real‑World Inspiration
- Backyard Retreat – A homeowner in Oregon used 12 reclaimed pallets, stained them a deep mahogany, and added a trellis for morning glories. The fence now doubles as a privacy screen and a garden support.
- Urban Alley Garden – In Detroit, a small community garden used pallet fences to separate plot sections; the raw wood adds a gritty, industrial vibe that matches the neighborhood’s character.
- Kid‑Friendly Play Zone – A family in Texas built a low pallet fence around a sandpit, then painted the boards in bright primary colors for a whimsical look.
(Tip: Snap a photo of your own pallet fence and tag #PalletFenceDIY on Instagram—our community loves seeing your creations!)
Final Thoughts
A fence made from pallet wood is more than a cost‑saving hack; it’s a statement that you value resourcefulness, craftsmanship, and style. With a handful of basic tools, a little planning, and the right safety precautions, you can transform a stack of forgotten pallets into a sturdy, eye‑catching boundary that will last for years.
Ready to start? Gather those pallets, sketch your design, and let the sawdust fly!
Happy building, and don’t forget to share your progress in the comments below.