DIY Pallet Fence: A Budget‑Friendly, Eco‑Smart Way to Up‑Style Your Yard
If you’ve ever stared at a stack of wooden pallets and thought, “There’s got to be a better use for these,” you’re not alone. Turning scrap pallets into a stylish fence is one of the most satisfying weekend projects you can tackle. Below we’ll walk through why a pallet fence works, what you’ll need, step‑by‑step construction tips, design variations, and maintenance tricks to keep it looking fresh year after year.
Why Choose Pallets for a Fence?
| Benefit | What It Means for You |
|---|---|
| Cost‑effective | Pallets are often free (ask local hardware stores, warehouses, or grocery chains). |
| Eco‑friendly | Repurposing pallets reduces waste and gives new life to a material that would otherwise end up in a landfill. |
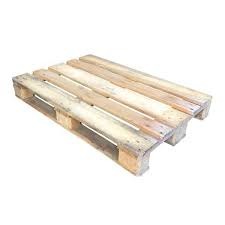
| Easy to work with | Most pallets are 40 × 48 in., have uniform slats, and can be cut with a simple circular saw. |
| Customizable | Paint, stain, add lattice, or incorporate planters—your fence becomes a canvas for creativity. |
| Quick installation | With the right tools, you can erect a basic fence in a single weekend. |
Planning Your Pallet Fence
1. Define the Purpose
- Privacy – Stack pallets horizontally for solid walls, or add slats and a backing board.
- Boundary marker – A single‑row “rail fence” keeps things tidy without blocking sight.
- Garden support – Integrate trellis sections for climbing vines.
2. Measure & Map
- Determine length and height.
- Sketch a simple plan showing post locations (usually every 6‑8 ft).
- Note any gates, curves, or obstacles (trees, slopes).
3. Check Local Regulations
- Some municipalities require permits for fences over a certain height or for structures that touch property lines.
- Verify setback requirements to avoid neighbor disputes.
4. Source Quality Pallets
- Look for “HT” (heat‑treated) stamps – safer than chemically treated pallets (marked “KD”).
- Inspect for damage: avoid pallets with broken slats, excessive rot, or large nail protrusions.
- Size consistency: uniform pallet dimensions simplify stacking.
Materials & Tools Checklist
| Material | Qty (per 8‑ft section) | Notes |
|---|---|---|
| Pallet boards (40 × 48 in.) | 2–3 (depending on design) | Remove all nails, sand surfaces |
| 4×4 pressure‑treated posts | 2 (one for each end) | Set in concrete for stability |
| Galvanized carriage bolts (⅜″ × 3 in.) | 12–16 | Corrosion‑resistant |
| Deck screws (2‑½″) | 1 lb | For attaching slats |
| Landscape fabric | 1 roll (optional) | Prevents weeds between pallets |
| Concrete mix | 2 bags (for anchoring posts) | 50‑lb bags, mix per instructions |
| Paint, stain, or sealant | As needed | Choose UV‑resistant exterior finish |
| Tools | ||
| Circular saw or handsaw | – | For cutting pallets |
| Drill/driver | – | With screwdriver bits |
| Hammer or nail gun | – | For temporary nailing |
| Level & measuring tape | – | Precision matters |
| Shovel or post‑hole digger | – | For setting posts |
| Safety gear (gloves, goggles) | – | Always wear protection |
Step‑by‑Step Build Guide
Step 1 – Prepare the Site
- Mark post locations using spray paint or stakes at 6‑ft intervals.
- Dig post holes 2 ft deep (or 1/3 the post length).
- Add a few inches of gravel for drainage, then set the 4×4 post, ensuring it’s plumb with a level.
- Backfill with concrete, sloping the surface away from the fence to shed water.
- Let the concrete cure at least 24 hrs before attaching anything.
Step 2 – Disassemble & Clean Pallets
- Remove all nails with a pry bar or nail puller.
- Strip off any loose boards and label the remaining slats (e.g., “Side A”).
- Sand rough edges to avoid splinters and improve paint adhesion.
Step 3 – Build the Fence Panels
Option A – Horizontal “Solid” Panel (great for privacy)
- Lay two pallets side‑by‑side on a flat surface, slats facing outward.
- Secure them together with carriage bolts through the outer studs (pre‑drill ¼‑in. pilot holes).
- Add a third pallet on top (optional) for extra height; stagger the seams for stability.
Option B – Vertical “Rail” Panel (open, decorative)
- Stand pallets on their narrow edge (so the 48‑in. side is vertical).
- Space them 12‑in. apart to create a lattice look.
- Fasten each pallet to the posts using deck screws or bolts at the top and bottom rails.
Option C – Mixed‑Use Panel with Trellis
- Attach a pallet as a solid base (≈3 ft high).
- Mount a second pallet horizontally above it, leaving a gap for a custom trellis.
- Insert 2×2 lumber or reclaimed garden lattice into the gap, securing with screws.
Step 4 – Install Panels Between Posts
- Lift the completed panel (ask a helper) and align it with the posts.
- Secure with carriage bolts through the outer pallet studs into the post’s pre‑drilled holes.
- Check for level after each panel; adjust shims if needed.
Step 5 – Finish & Protect
- Apply a coat of exterior primer to all exposed wood.
- Paint or stain to match your home’s palette.
- Seal with a clear polyurethane or spar urethane for extra UV protection.
- Add a drip edge (metal flashing) at the bottom if you live in a rainy area to keep water from pooling.
Design Ideas to Make Your Pallet Fence Stand Out
| Style | How to Achieve It |
|---|---|
| Rustic farmhouse | Use reclaimed barn wood for a top rail, paint white, add black iron brackets. |
| Modern minimal | Sand to a smooth finish, stain a light natural tone, keep gaps uniform (≈½ in.) for a sleek look. |
| Garden oasis | Integrate planter boxes built into the bottom pallet, plant herbs or succulents. |
| Kids’ play fence | Paint bright colors, attach a low horizontal pallet as a “climbing wall” with soft foam padding. |
| Artistic mural | Prime the pallets and let kids (or a local artist) paint a mural that spans the fence length. |
Maintenance Tips
- Inspect annually for loose bolts, rotting boards, or protruding nails. Tighten or replace as needed.
- Re‑seal every 2–3 years (or sooner if you notice water spotting).
- Clear debris – leaves and mulch can trap moisture against the wood, accelerating decay.
- Rotate panels if you notice one side fading faster; a fresh coat can revive the whole fence.
Frequently Asked Questions
Q: Are pallet fences legal?
A: Yes, as long as they meet local building codes (height, setbacks) and you use pressure‑treated posts for ground contact.
B: Do I need to treat pallets for pests?
A: Heat‑treated pallets (HT stamp) are already pest‑free. If you’re unsure, apply a borate wood preservative before assembly.
C: Can I use pallets for a gate?
A: Absolutely. Build a rectangular frame from 4×4 posts, attach two pallets as hinges, and use a simple latch or a heavy‑duty bolt lock.
D: How high can I go?
A: For a sturdy DIY fence, 6–8 ft is practical. Beyond that, you’ll need additional bracing and possibly a professional engineer’s input.
Final Thoughts
A pallet fence is more than just a cheap boundary—it’s a statement about sustainability, creativity, and hands‑on craftsmanship. By repurposing something as commonplace as a shipping pallet, you’ll not only save money but also give your outdoor space a unique character that reflects your personal style.
Grab a saw, rally a friend, and start stacking. Within a weekend, you’ll have a beautiful, functional fence that turns heads, protects your privacy, and proves that great design often starts with the simplest of materials.
Ready to build? Share your progress in the comments below—pictures, tips, or even a “before and after” gallery. Happy pallet‑crafting!