Building a Charming Fence with Pallet Wood – A DIY Guide
“Give a wood pallet a second life and watch your backyard transform.”
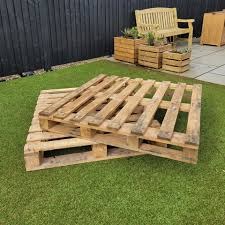
If you’ve ever walked past a stack of weather‑worn pallets at a warehouse, you’ve probably wondered what to do with all that free wood. The answer is simple: turn it into a stunning, budget‑friendly fence. Whether you’re looking for privacy, a decorative border, or a rustic backdrop for your garden, pallet wood can be the perfect material—provided you know the right way to work with it.
In this post we’ll walk you through why pallet wood works for fencing, what you need to get started, step‑by‑step construction tips, and how to finish and maintain your fence for years to come. By the end, you’ll have everything you need to roll up your sleeves and start building a fence that’s as functional as it is beautiful.
1. Why Choose Pallet Wood for a Fence?
| ✅ | Reason | What It Means for You |
|---|---|---|
| Cost‑effective | Most pallets are free or cost pennies. | You can stretch a modest budget to cover posts, hardware, and tools. |
| Eco‑friendly | Repurposing pallets reduces waste. | You’re giving a second life to wood that would otherwise end up in a landfill. |
| Rustic aesthetic | Pallets have a natural, weathered look. | Perfect for farmhouse, industrial, or casual garden vibes. |
| DIY friendly | Pallets are designed for easy disassembly. | You can break them down with basic hand tools. |
| Versatile | Boards can be used whole, cut, or rearranged. | Create horizontal slats, vertical panels, or decorative patterns. |
Quick tip: Look for pallets stamped with “HT” (heat‑treated) or “MB” (millboard). Avoid “WT” (wet‑treated) pallets, as they have been treated with chemicals not safe for garden use.
2. Planning Your Pallet Fence
2.1 Decide on the Fence Type
| Fence Goal | Recommended Pallet Style |
|---|---|
| Privacy | Overlapping horizontal slats or tightly spaced vertical boards. |
| Decorative border | Open lattice or staggered pattern with gaps for airflow. |
| Garden support | Trellis‑style fence for climbing vines. |
| Pet containment | Solid wall with a height of 4–5 ft and sturdy posts. |
2.2 Measure & Sketch
- Measure the length of the area you want to fence.
- Determine height—most DIY pallet fences work well at 3–5 ft.
- Sketch a simple plan: note where posts will go (generally every 6–8 ft) and how many pallet panels you’ll need.
2.3 Gather Materials
| Item | Approximate Quantity (for a 30‑ft, 4‑ft‑high fence) |
|---|---|
| Pallet boards (6 × 1‑ft slats) | 120–150 pieces |
| 4 × 4 pressure‑treated posts | 6‑8 (spaced 6 ft apart) |
| Concrete mix (for post set) | 8 bags (80 lb each) |
| Galvanized deck screws (2‑in.) | 5 lb box |
| 2‑in. exterior wood screws (for brackets) | 1 lb box |
| Metal post brackets | 6‑8 sets |
| Weed‑stop fabric (optional) | 30 ft roll |
| Wood stain or exterior paint | 1‑2 gal |
| Protective sealant (polyurethane or spar urethane) | 1 gal |
| Tools (saw, drill, level, tape measure, hammer, shovel) | – |
Pro tip: Buy a few extra boards—pallet wood is inconsistent, and you’ll thank yourself when a board splits or warps.
3. Preparing the Pallet Wood
3.1 Disassemble the Pallets
- Safety first: Wear gloves, safety glasses, and a dust mask.
- Use a reciprocating saw or circular saw to cut the nails near the corners.
- Pry the boards apart with a crowbar or a pallet jack. Remove any remaining nails with a nail puller or pliers.
3.2 Clean & Inspect
- Remove dirt & splinters with a stiff brush.
- Check for rot or severe cracks—discard any pieces that feel soft or crumbly.
- Sand rough edges lightly (120‑grit) to prevent splinters.
3.3 Treat the Wood
Even though pallets are designed for outdoor use, it’s wise to apply a wood preservative before assembly:
- Apply a clear wood preservative (oil‑based) with a brush or sprayer.
- Let it dry for 24 hrs in a well‑ventilated area.
If you plan to paint or stain the fence, you can skip this step and go straight to priming with an exterior‑grade primer.
4. Building the Fence – Step‑by‑Step
Step 1 – Set the Posts
- Mark post locations with spray paint (every 6 ft).
- Dig 8‑inch wide, 24‑inch deep holes (or deeper for windy areas).
- Place a 4‑in. layer of gravel at the bottom for drainage.
- Insert the 4 × 4 post and center it.
- Fill the hole with quick‑setting concrete.
- Check for plumb with a level; brace the post with temporary stakes.
- Let the concrete cure 24‑48 hrs.
Step 2 – Attach Brackets
- Secure metal post brackets to the side of each post (use 2‑in. exterior screws).
- These brackets will hold the pallet panels, allowing you to remove them later for repainting.
Step 3 – Assemble Pallet Panels
Option A: Horizontal Slats (privacy style)
- Lay the boards side‑by‑side on a flat surface, aligning the top edges.
- Secure each board to a 2‑×‑4 backing strip (cut to length) with 2‑in. deck screws every 12 in. This backing adds rigidity.
- Stack the assembled panel on the ground, checking for level.
Option B: Vertical Boards (open‑lattice style)
- Attach each board to a vertical 2‑×‑4 frame (spaced 6‑8 in. apart).
- Use a countersink drill bit to avoid visible screw heads.
Step 4 – Mount the Panels
- Position the panel against the post brackets.
- Drill pilot holes through the bracket into the panel’s backing strip.
- Secure with galvanized deck screws (2‑in.)—two screws per bracket end are enough.
- Repeat for each panel, keeping a tight, uniform gap (if you want an open look).
Step 5 – Add a Bottom Barrier (optional)
- For added privacy or to keep pets in, attach a horizontal board or wire mesh at the base of the fence.
- Secure with staples or screws into the posts.
Step 6 – Finish the Fence
- Prime the entire fence with an exterior primer (especially if you’re staining).
- Apply stain or paint in the color of your choice—use a brush for tight spots and a roller for larger surfaces.
- Once dry, protect the wood with a clear sealant (polyurethane or spar urethane). This adds UV resistance and water repellency.
5. Maintenance Tips to Keep Your Pallet Fence Looking Fresh
| Maintenance Task | Frequency | How‑to |
|---|---|---|
| Inspect for loose screws | Every 6 months | Tighten with a screwdriver or drill. |
| Re‑seal or re‑stain | Every 2–3 years (or as weather dictates) | Lightly sand, clean, then apply another coat of sealant. |
| Remove debris | Quarterly | Sweep leaves and mulch away to prevent moisture buildup. |
| Check for rot | Annually | Replace any board that feels soft or shows extensive splintering. |
| Clean surface | Yearly | Wash with mild soap and water; rinse thoroughly. |
Pro tip: If you live in a high‑humidity area, consider a water‑repellent wood preservative every year to stave off mold.
6. Design Inspiration – What’s Possible with Pallet Wood?
| Design | Description | Ideal Use |
|---|---|---|
| Horizontal “Board‑on‑Board” | Overlapping horizontal slats for complete privacy. | Backyard enclosures, pool fences. |
| Vertical “Lattice” | Thin vertical slats spaced 2‑3 in. apart for a light feel. | Garden trellises, decorative borders. |
| Chevron Pattern | Boards cut into triangles and arranged in a V‑shape. | Modern farmhouse look. |
| Mixed‑Media | Pallet wood combined with reclaimed metal or glass panels. | Contemporary, industrial vibe. |
| Painted Accent Stripes | Neutral stain with bold colored stripes every few boards. | Playful, kid‑friendly backyard. |
7. Frequently Asked Questions (FAQ)
Q1: Is pallet wood safe for a fence that will be near kids or pets?
A: Yes, as long as you avoid “WT” (wet‑treated) pallets, sand rough edges, and apply a non‑toxic sealant. Heat‑treated pallets (HT) are the safest choice.
Q2: Do I need a building permit?
A: Permit requirements vary by city and fence height. Generally, fences under 4 ft in the front yard don’t need a permit, but double‑check with your local building department.
Q3: Can I use nails instead of screws?
A: Screws are preferable because they hold better under wind load and are less likely to loosen over time. If you must use nails, choose galvanized nails and add a few screw reinforcement points.
Q4: What if my pallets have uneven boards?
A: Trim them to a uniform width with a circular saw or table saw. Even boards ensure a straight, professional‑looking fence.
Q5: How do I protect the fence from rot in a rainy climate?
A: Use a water‑repellent preservative before assembly, and always apply a high‑quality exterior sealant. Keep the bottom of the fence off direct ground contact by adding a capped post or a plastic barrier.
8. Final Thoughts
A pallet‑wood fence is more than a cheap DIY project—it’s a statement that you value creativity, sustainability, and hands‑on craftsmanship. By following the steps above, you’ll have a sturdy, attractive barrier that enhances privacy, frames your garden, and showcases reclaimed material in a stylish way.
Ready to get started? Grab a few pallets from a local warehouse, gather your tools, and let the transformation begin. And when you’re done, don’t forget to snap a photo and share it with the community—your pallet fence might just inspire the next neighbor to start their own sustainable project.