Build a Pallet‑Wood Chicken Coop You’ll Love
Pallet Wood Chicken Coop. If you’ve ever watched a backyard flock peck around your garden and thought, “I wish I could give them a nice, safe home without breaking the bank,” you’re not alone. The good news is that a sturdy, attractive chicken coop can be built for a fraction of the price of a commercial unit—especially when you use pallet wood. In this guide you’ll learn everything you need to know to design, construct, and maintain a pallet‑wood chicken coop that keeps your birds happy, healthy, and safe from predators. Pallet Wood Chicken Coop.
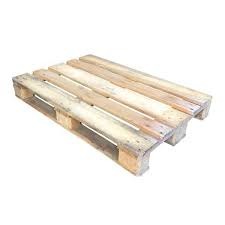
Why Choose Pallet Wood?
| Benefit | What It Means for You | Typical Cost |
|---|---|---|
| Readily Available | Many grocery stores, warehouses, and hardware stores give pallets away for free or a small fee. | $0–$30 per 48‑in. pallet |
| Eco‑Friendly | Reusing pallets reduces waste and gives you a “green” project you can be proud of. | — |
| Strong & Durable | Pallet boards are usually made from hardwood or robust softwood that can handle outdoor conditions. | — |
| Easy to Modify | Standard dimensions (48×40 in.) simplify cutting and planning. | — |
| Aesthetic Potential | With a little sanding and staining, pallets can look rustic and charming. | — |
When you start a pallet‑wood coop, you’re not just saving money—you’re also giving a second life to a material that would otherwise sit in a landfill.
Planning Your Coop: The First Steps
1. Define the Size
A rule of thumb is 4 sq. ft. of coop space per bird and 10 sq. ft. of run space per bird. If you plan for 6 chickens, you’ll need at least a 24‑sq.‑ft. coop (e.g., 4 ft × 6 ft) and a 60‑sq.‑ft. run.
| Number of Birds | Minimum Coop Area | Minimum Run Area |
|---|---|---|
| 2–3 | 8–12 sq ft | 20–30 sq ft |
| 4–6 | 16–24 sq ft | 40–60 sq ft |
| 7–10 | 28–40 sq ft | 70–100 sq ft |
2. Choose a Location
- Elevated Ground: Avoid low‑lying spots that collect water. A small concrete pad or compacted gravel base works best.
- Sun & Shade: Position the coop where it gets morning sun (helps dry the bedding) and afternoon shade (prevents overheating).
- Ventilation & Wind Protection: Face the coop’s opening toward a prevailing breeze, but use windbreaks (hedges, fences) on the leeward side.
3. Sketch a Simple Plan
Draw a rough rectangle for the coop and a larger adjoining rectangle for the run. Mark where the door, nesting boxes, roosts, and ventilation windows will go. Sketching helps you estimate how many pallets you’ll need and reduces costly mistakes later.
Materials & Tools Checklist
Below is a comprehensive table that covers everything you’ll need, with typical price ranges (U.S. dollars) if you have to purchase items.
| Category | Item | Qty* | Approx. Cost | Notes |
|---|---|---|---|---|
| Pallet Wood | 48‑in. pallets (clean, heat‑treated) | 6–10 | $0–$30 each | Ask for “HT” pallets (no chemicals). |
| Fasteners | 2‑in. exterior wood screws | 3‑lb box | $8–$12 | Stainless steel or coated for rust resistance. |
| 1‑¼‑in. galvanized nails | 1‑lb box | $4–$6 | For quick framing. | |
| Hardware | Hinge set (2 hinges, 2 pins) | 1 set | $5–$8 | Heavy‑duty for coop door. |
| Latch with lock | 1 | $3–$5 | Predator‑proof latch. | |
| Roofing | Corrugated metal panels (12‑ft length) | 2 panels | $20–$30 each | Long‑lasting, water‑tight. |
| Roofing nails | 1‑lb box | $4–$6 | ||
| Floor | Plywood (½‑in. exterior grade) | 1 sheet (4 × 8 ft) | $30–$45 | For a solid base under pallets. |
| Insulation (optional) | R‑value foam board (½‑in.) | 2 sheets | $15–$20 each | Useful in colder climates. |
| Finishing | Exterior wood stain or paint | 1‑gal | $20–$35 | Protects wood from moisture. |
| Ventilation | 4‑in. hardware cloth (mesh) | 2 × 4‑ft panel | $6–$10 | For windows/vents. |
| Bedding | Pine shavings or straw | 1‑bag (50 lb) | $5–$8 | Replace regularly. |
| Tools | Circular saw or handsaw | 1 | — | You likely already own this. |
| Power drill/driver | 1 | — | ||
| Measuring tape, level, carpenter’s square | 1 each | — | ||
| Safety gear (gloves, goggles) | — | — |
Qty is a guideline; adjust based on your coop dimensions.
Step‑By‑Step Build Guide
Step 1 – Disassemble & Clean the Pallets
- Safety first: Wear gloves and goggles.
- Remove nails and staples with a pry bar or nail puller.
- Sort the boards by length and condition. Aim for as many full‑width (48‑in.) pieces as possible; they’ll become the walls and floor joists.
Step 2 – Build the Frame
- Floor joists: Lay two 48‑in. pallets side‑by‑side, screw them together, then add a 2‑in. thick plywood sheet on top. This creates a sturdy, level base.
- Wall studs: Use 2‑in.×4‑in. pallet boards vertically, spaced 16 in. apart, to form the frame. Secure each stud to the floor joists with two screws at each end.
Step 3 – Assemble the Walls
- Side walls: Attach pallet boards horizontally, overlapping the studs like a deck. Stagger seams for extra strength.
- Back wall: Leave a 6‑in. gap near the top for a vent. Cover the vent with hardware cloth, securing it with staples.
- Front wall: Frame an opening 24 in. wide (adjust for your door) and install a pre‑hinged door. Add a latch that can be locked from the outside.
Step 4 – Install the Roof
- Rafters: Cut two 2‑in.×4‑in. pallets to the desired roof pitch (typically 4‑in. rise per 12‑in. run).
- Sheathing: Lay the corrugated metal panels over the rafters, overlapping the seams by at least 2 in. Secure with roofing nails every 6 in.
- Overhang: Extend the roof 6–8 in. beyond the walls to keep rain off the siding.
Step 5 – Add Interior Features
| Feature | Placement | How to Build |
|---|---|---|
| Nesting Boxes | 12‑in. from floor, against back wall | Stack 12‑in.×12‑in.×12‑in. pallet boards, cut an opening 4‑in. high, line with straw. |
| Roosting Bars | 18‑in. above floor, along side wall | Use a 2‑in.×4‑in. pallet board, smooth edges, secure with brackets. |
| Ventilation Windows | Upper third of side walls | Cut 12‑in.×8‑in. openings, cover with hardware cloth, secure with staples. |
| Door Hatch (optional) | Small access for cleaning | Add a secondary 6‑in.×8‑in. door with a simple latch. |
Step 6 – Finish & Protect
- Sand rough edges to prevent injuries to both birds and humans.
- Apply exterior stain or paint in two coats. This seals the wood against moisture and UV damage.
- Install a predator‑proof perimeter around the run: bury hardware cloth at least 12 in. underground and attach it to a 4‑ft. high fence.
Step 7 – Populate and Maintain
- Add bedding (pine shavings or straw) to the floor.
- Place feed and water containers inside the coop but away from nesting boxes.
- Conduct weekly checks: look for loose boards, rusted screws, and clean out droppings. Replace bedding every 1–2 weeks to control odor and parasites.
Design Tips & Common Mistakes to Avoid
| Tip | Why It Matters |
|---|---|
| Leave a 2‑in. gap at the bottom of walls | Allows air flow and prevents moisture buildup. |
| Install a removable floor panel | Makes deep cleaning easier; you can lift the panel and hose out the coop. |
| Use a steep roof pitch in rainy areas | Water runs off faster, reducing leaks. |
| Avoid pressure‑treated pallets | Some contain copper or arsenic chemicals that can leach into the coop. Stick to heat‑treated (“HT”) pallets. |
| Don’t skip the hardware cloth on vents | Small predators (weasels, raccoons) can squeeze through gaps as small as ¼‑in. |
| Space roosts at least 2 ft. from the floor | Helps keep droppings off the perches, reducing disease risk. |
Cost Breakdown (Sample 6‑Bird Coop)
| Item | Qty | Unit Cost | Total |
|---|---|---|---|
| Pallet wood (HT) | 8 pallets | $15 | $120 |
| ½‑in. exterior plywood | 1 sheet | $35 | $35 |
| Corrugated metal roofing | 2 panels | $25 | $50 |
| Screws, nails, hardware | — | $30 | $30 |
| Stain & brush | 1 gal | $28 | $28 |
| Hardware cloth (vent) | 2 panels | $8 | $16 |
| Tools (if needed) | — | $0 (assumed) | $0 |
| Grand Total | $279 |
If you can source free pallets, the cost drops to under $150.
Frequently Asked Questions (FAQ)
Q1: Are all pallets safe for chicken coops?
A: No. Avoid pallets marked with the “MB” (methyl bromide) symbol, and stay away from pallets that look chemically treated (often green or brown). Heat‑treated (“HT”) pallets are the safest choice.
Q2: How do I make the coop predator‑proof?
A: Use ½‑in. hardware cloth for all openings, bury it 12 in. around the perimeter, and add a sturdy latch on the door. A roof overhang and a locked door are essential against raccoons and foxes.
Q3: Do I need insulation?
A: In mild climates, a solid wood floor and good ventilation are enough. In colder zones, add a layer of foam board under the floor or line the interior walls with straw batt insulation, then cover with plywood to protect the birds.
Q4: How often should I replace the bedding?
A: Replace or refresh the bedding every 7–14 days, depending on flock size and humidity. Adding a thin layer of fresh shavings on top of the old helps control odor between full changes.
Q5: Can I attach the coop to an existing fence?
A: Yes—just make sure the connection is secure and the fence material can’t be chewed through. Adding a 2‑in. wooden strip between the coop and fence helps seal gaps.
Q6: What’s the best way to clean the coop?
A: Remove the removable floor panel (if you built one), sweep out droppings, hose the interior with warm water, and let it dry completely before adding fresh bedding. An occasional deep clean with a diluted vinegar solution (1:10) helps control bacteria.
Q7: My chickens are pecking at the wood—what should I do?
A: Sand any rough edges and consider applying a non‑toxic sealant. Chickens naturally peck, so you can also provide a designated “pecking block” or a basket of loose pine cones to satisfy that instinct.
Final Thoughts
Building a pallet‑wood chicken coop is a rewarding project that blends budget‑friendly DIY with sustainable gardening. By following the steps, tables, and tips outlined above, you’ll create a coop that:
- Meets the space needs of your flock
- Stands up to weather and predators
- Looks rustic and blends with your garden aesthetic
- Costs far less than a store‑bought unit
Remember, the most successful coops are the ones you maintain regularly. Set aside a few minutes each week for inspection, cleaning, and minor repairs, and your feathered friends will thank you with fresh eggs and lively personalities.
Now that you have a clear roadmap, grab those pallets, fire up your drill, and start building a home that both you and your chickens can be proud of. Happy coop‑crafting!