Build Your Own Queen‑Size Wood Pallet Bed Frame
The ultimate guide to a stylish, budget‑friendly bedroom upgrade
Why a Pallet Bed Frame?
If you’re scrolling through DIY home‑improvement ideas, you’ve probably seen the endless stream of pallet projects—coffee tables, garden planters, even entire living‑room sets. Pallets are an excellent material for a queen‑size bed frame for several reasons:
| Benefit | How It Helps You |
|---|---|
| Affordability | A single pallet can cost as little as $10–$20, and you’ll need only 2–4 to build a sturdy queen frame. |
| Sustainability | Repurposing pallets keeps wood out of landfills and reduces demand for newly milled lumber. |
| DIY Flexibility | Pallets come in a variety of dimensions and finishes, letting you customize the look and size to fit your bedroom. |
| Strength | When properly sanded and reinforced, pallets can support a 250 lb+ mattress and sleepers without sagging. |
| Ease of Assembly | Most pallets are pre‑drilled and already have a rectangular shape, meaning you spend less time cutting and more time sanding and staining. |
By the end of this post you’ll have everything you need to turn a few humble pallets into a queen‑size masterpiece that rivals store‑bought frames—both in looks and durability.
What You’ll Need
Before you start sawing, make a checklist. Having all tools and materials on hand will keep the project flowing smoothly.
| Item | Recommended Brand/Option | Approx. Cost (USD) |
|---|---|---|
| Wood pallets (4–5, high‑grade, heat‑treated) | “HT” pallets from local hardware store or Craigslist | $10–$20 each |
| Circular saw or table saw | DEWALT or Bosch 7‑1/4 in. | $150–$250 (if you don’t own one) |
| Power drill + set of drill bits | Makita 18V cordless | $100–$150 |
| Screwdriver set | Phillips & flat‑head | $30 |
| Wood screws (2½ in., deck‑grade) | GRK or Simpson Strong‑Tie | $10 per box |
| Sandpaper (80, 120, 220 grit) | 3‑M | $10 |
| Wood filler (optional, for knots) | Minwax | $5 |
| Stain or paint (your color choice) | Varathane or Sherwin‑Williams | $15–$30 |
| Polyurethane clear coat (matte or satin) | Minwax | $12 |
| Measuring tape & carpenter’s square | Stanley | $15 |
| Safety gear (gloves, goggles, dust mask) | 3‑M | $20 |
Tip: If you already have a workshop, many of these items may already be in your toolbox, dramatically reducing the overall cost.
Step‑by‑Step Build Guide
Below is a concise table summarizing each phase of the build. Follow the detailed explanations that follow each row.
| Step | Action | Materials / Tools | Approx. Time |
|---|---|---|---|
| 1 | Select & inspect pallets | Pallets, safety gear | 15 min |
| 2 | Disassemble pallets (remove slats) | Saw, pry bar, hammer | 30 min |
| 3 | Sand all wood (rough → fine) | Sandpaper, orbital sander | 45 min |
| 4 | Cut slats to size (headboard, footboard, side rails) | Circular saw, measuring tape | 30 min |
| 5 | Assemble frame (attach side rails to head/foot) | Drill, wood screws, carpenter’s square | 60 min |
| 6 | Reinforce with cross‑bracing | Additional slats, screws | 30 min |
| 7 | Apply finish (stain → polyurethane) | Brush/roller, drop cloth | 2 hrs (incl. drying) |
| 8 | Install mattress & accessories | Mattress, bedding | 10 min |
Total estimated time: 5–6 hours (including drying time). You can split the work over a weekend or two, depending on your schedule.
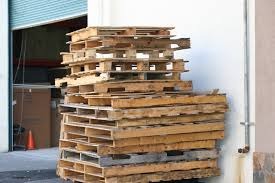
1. Select & Inspect Pallets
Choose heat‑treated (HT) pallets rather than chemically treated ones—HT pallets are safe for indoor furniture. Inspect each pallet for:
- Cracks or splits that could compromise strength.
- Loose nails or staples that need removal.
- Mold or rot (avoid any pallet with a sour smell or dark, soft spots).
If you’re buying from a supplier, ask for “clean, undamaged, heat‑treated pallets.” For a queen size (60″ × 80″), you’ll need four full‑size pallets for the sides and a fifth cut in half for the headboard and footboard, or you can split the side pallets into two rails each (see the “Design Options” table later).
2. Disassemble Pallets
Lay a pallet flat, then use a pry bar and hammer to gently lift the top deck boards. Most pallets are secured with nails; pull them out with pliers or a nail puller. Keep the slats—they’re the raw material for your frame.
Pro tip: If a board is nailed too tightly, cut it off with a circular saw and replace it with a spare slat. This saves time and prevents splintering.
3. Sand All Wood
Start with 80‑grit sandpaper to smooth rough edges, then progress to 120‑grit and finish with 220‑grit for a silky surface. An orbital sander speeds up the process, but hand‑sanding key corners (where screws will sit) is fine.
If you see any gaps or nail holes, fill them with wood filler and sand again once dry.
4. Cut Slats to Size
Measure precisely:
- Side rails: 80″ long, 12″ tall (standard pallet height).
- Headboard & footboard: 60″ wide, 12″ tall.
Add ½‑inch to each cut to allow for a snug joint with the screws. Use a circular saw with a straight edge guide to keep cuts clean.
5. Assemble the Frame
Lay the two side rails parallel on the floor, spaced 60″ apart (the width of a queen mattress). Align the headboard and footboard between them, forming a rectangle.
- Drill pilot holes (½‑inch deep) through the side rails into the head/foot slats.
- Insert 2½‑inch deck screws—two per corner, spaced evenly (about 6″ from each end).
- Check for squareness with a carpenter’s square; adjust as needed before tightening fully.
6. Reinforce with Cross‑Bracing
For extra stability (especially if you plan to store items under the bed), add two cross‑braces per side:
- Cut two slats to 60″ length.
- Position them halfway up each side rail, perpendicular to the rails.
- Secure with three screws each, staggered for maximum grip.
7. Apply Finish
Finish not only looks great but protects the wood from moisture and wear.
- Stain (optional). Apply with a brush or rag, following grain direction. Let dry 30 min.
- Polyurethane (matte or satin). Use a clean brush; apply thin, even coats. Let each coat dry 1 hour before lightly sanding with 220‑grit sandpaper and applying the next coat. Two coats are sufficient for a bedroom setting.
8. Install Mattress & Accessories
Place your queen mattress directly onto the frame. Because the pallet slats are spaced like a rustic slatted base, airflow is naturally good—no need for a box spring.
Add your favorite bedding, and you’re ready to enjoy a custom‑crafted centerpiece that says, “I did it myself.”
Design Variations to Suit Your Style
| Style | Description | Modifications |
|---|---|---|
| Industrial Rustic | Raw pallet wood with a matte oil finish. | Keep nails visible; add reclaimed metal pipe legs. |
| Scandinavian Minimal | Light‑stained pallet wood, whitewashed edges. | Paint underside white; add slim, black metal slats for support. |
| Boho Chic | Dark walnut stain, woven storage baskets underneath. | Add a low headboard with fabric upholstery; install hidden drawers. |
| Modern Farmhouse | Distressed gray stain, exposed shiplap on headboard. | Use reclaimed barn wood for the headboard; attach a floating nightstand. |
Feel free to mix and match—your pallet bed frame can be as simple or as elaborate as you wish.
Safety & Maintenance Checklist
| Issue | Prevention / Remedy |
|---|---|
| Splinters | Sand all surfaces thoroughly; finish with polyurethane. |
| Loose Screws | Tighten after the first month of use; re‑check quarterly. |
| Moisture Damage | Keep the bedroom humidity below 60 %; apply a water‑resistant sealant if needed. |
| Pest Infestation | Treat wood with a non‑toxic borate solution before assembly. |
| Weight Limits | Do not exceed 250 lb per side; distribute load evenly across the slats. |
Frequently Asked Questions (FAQ)
Q1: Do I need to treat pallets for indoor use?
Yes. Even heat‑treated pallets can contain residual chemicals or small splinters. Sand thoroughly, fill gaps, and finish with a low‑VOC sealant to ensure a safe, indoor‑ready surface.
Q2: Can I use a pallet frame without a box spring?
Absolutely. The pallet slats act as a breathable foundation, eliminating the need for a box spring. Just ensure the slats are spaced no more than 2‑3 inches apart to support the mattress evenly.
Q3: How much does a DIY pallet queen bed cost?
A typical project runs $120–$200, depending on whether you purchase new pallets or repurpose free ones, and on the finish you choose. Compare that with a store‑bought queen frame that often costs $350–$800.
Q4: What’s the best way to attach the headboard securely?
Use metal L‑brackets inside the headboard to anchor it to the side rails. This adds hidden strength and prevents wobble without visible hardware.
Q5: Can I add storage drawers underneath?
Yes! Build a simple drawer box from the same pallet slats, attach runners to the inside of the side rails, and slide the drawer in. A 10‑inch clearance works well for clothing or linens.
Q6: Are pallets safe for people with allergies?
Since pallets are wood, they generally do not trigger allergies. However, if you have a severe wood dust sensitivity, wear a mask while sanding and finish the wood promptly to seal in dust particles.
Q7: How do I dispose of leftover pallet material?
Donate usable slats to local schools or makerspaces, or recycle them at a wood recycling center. If you have small fragments, use them as fire‑starter kindling.
Final Thoughts
Building a queen‑size wood pallet bed frame empowers you to combine budget‑savvy creativity with a personalized aesthetic. By following the steps above, you’ll end up with a sturdy, stylish centerpiece that can withstand years of sleep, reading, and late‑night Netflix binges—all while keeping your carbon footprint low.
So gather those pallets, roll up your sleeves, and start turning raw wood into a bedroom masterpiece. Your future self (and your wallet) will thank you!