Wood Pallet Kitchen Backsplash: A DIY Guide That Turns Scraps into Style
If you’ve ever walked past a sleek, reclaimed‑wood backsplash and thought, “I could do that,” you’re not alone. With the surge in sustainable design, wood pallets have become the go‑to material for budget‑friendly, eco‑conscious makeovers. In this post you’ll discover how to transform ordinary pallets into a stunning kitchen backsplash that adds warmth, personality, and a story to your cooking space—without breaking the bank.
“I wanted a backsplash that felt like a piece of my family farm, but I couldn’t afford custom wood paneling. Repurposed pallets gave me that rustic charm for a fraction of the cost.” — Emily R., DIY enthusiast
Below you’ll find everything you need to get started: material selection, step‑by‑step installation, finishing options, maintenance tips, cost breakdowns, and a handy FAQ. Grab a cup of coffee, roll up your sleeves, and let’s make your kitchen the talk of the neighborhood.
1. Why Choose a Wood Pallet Backsplash?
| Benefit | What It Means for You |
|---|---|
| Eco‑friendly | Every pallet you up‑cycle keeps a piece of timber out of the landfill. |
| Cost‑effective | Pallets cost $2‑$8 each, compared with $30‑$80 per square foot for commercial wood panels. |
| Customizable | You can sand, stain, paint, or even leave the wood raw for a weathered look. |
| Texture & Warmth | Natural grain adds visual interest that tile or glass can’t replicate. |
| DIY Friendly | With basic tools—saw, sandpaper, adhesive—you can finish the project in a weekend. |
The combination of sustainability and aesthetic appeal makes pallet wood a smart choice for anyone who wants a kitchen that feels both modern and rooted in tradition.
2. Planning Your Pallet Backsplash
2.1 Measure the Area
- Measure the height from countertop to the bottom of the upper cabinets (usually 12‑18 in).
- Measure the length of the wall you’ll cover (including any window or vent cut‑outs).
- Calculate square footage: Height × Length ÷ 144 = square feet.
Example: A 30‑in high, 8‑ft long backsplash is 30 in × 96 in = 2,880 in² → 20 ft².
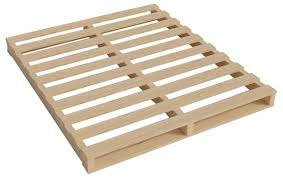
2.2 Source Quality Pallets
| Source | Pros | Cons |
|---|---|---|
| Home improvement stores | Clean, often free or inexpensive | May be heat‑treated (HT) – not ideal for food contact |
| Local businesses (warehouses, farms) | Variety of wood types, often untreated | Need to transport and inspect for nails |
| Online marketplaces (e.g., Craigslist) | Can find large bundles | Variable condition, potential hidden damage |
Tip: Look for pallets stamped “CP” (clean, untreated) or “HT” if you plan to seal the wood thoroughly; otherwise, stick with clean pallets to avoid chemicals.
2.3 Decide on Layout
- Full‑board: Whole pallet slats run vertically or horizontally for a bold statement.
- Shiplap style: Overlap boards for a classic farmhouse feel.
- Patchwork collage: Mix board widths for a whimsical, artistic vibe.
Sketch a quick layout on graph paper or use a free design app (e.g., SketchUp). Visualizing the pattern before cutting saves time and waste.
3. Preparing the Pallet Wood
3.1 Disassembly & Cleaning
- Remove nails – a nail puller or pliers will do; wear safety glasses.
- Strip the boards – use a hammer and a pry bar to separate slats.
- Sort – discard warped or heavily splintered pieces; keep the straight, sound boards.
3.2 Sanding & Surface Prep
| Step | Tool | Grit | Purpose |
|---|---|---|---|
| Rough sanding | Belt sander or hand block | 80‑100 | Remove rough edges, splinters |
| Medium sanding | Orbital sander | 150 | Smooth surface, open pores |
| Fine sanding | Hand sanding block | 220‑320 | Prepare for finish, eliminate scratches |
Always sand with the grain to avoid cross‑grain scratches. After sanding, vacuum the dust and wipe with a tack cloth.
3.3 Staining or Painting (Optional)
- Stain for a natural wood look—apply with a brush or lint‑free cloth, let dry 4‑6 hrs, then seal.
- Paint for bold colors—use a primer first, then two coats of latex or oil‑based paint.
Pro tip: If you love the natural grain but want a darker tone, choose a gel stain; it penetrates without blotching.
4. Installing the Backsplash
4.1 Materials Checklist
| Item | Quantity (approx.) | Why You Need It |
|---|---|---|
| Pallet boards (cut to size) | Depends on area (see §2) | Main visual element |
| Construction adhesive (e.g., Liquid Nails) | 1‑2 tubes | Secures boards to wall |
| Finish nails or brad nails | 1‑2 lb | Extra hold for heavy boards |
| Caulking gun & silicone sealant | 1 tube | Water‑resistant seal at joints |
| Painter’s tape | 1 roll | Protects countertops & cabinets |
| Protective finish (polyurethane, oil, or shellac) | 1‑2 qt | Protects wood from heat, moisture |
| Drop cloth & safety gear | 1 each | Clean, safe workspace |
4.2 Step‑by‑Step Installation
| Step | Action | Details |
|---|---|---|
| 1. Prep the wall | Clean, dry surface; patch holes | Use a mild detergent, then let dry. |
| 2. Tape off | Apply painter’s tape along countertop & cabinet edges | Prevents adhesive drips. |
| 3. Cut boards | Use a circular saw or table saw to size | Remember to leave a 1/4‑in. gap for expansion. |
| 4. Dry‑fit | Lay boards on floor to confirm layout | Make any adjustments before gluing. |
| 5. Apply adhesive | Spread a thin bead on the wall and back of board | Use a notched trowel for even coverage. |
| 6. Mount board | Press firmly for 30 seconds, then nail lightly | Space nails every 12‑16 in for stability. |
| 7. Seal joints | Run a bead of silicone along seams & edges | Smooth with a fingertip or caulk tool. |
| 8. Finish | Apply protective coat (2‑3 coats) | Lightly sand between coats with 320‑grit sandpaper. |
| 9. Clean up | Remove tape, wipe excess silicone, admire! | Check for any loose boards before using the kitchen. |
The entire process typically takes 2‑3 days (including drying time for adhesive and finish). If you’re a first‑timer, add an extra day for each step to avoid rushing.
“The biggest surprise was how quickly the adhesive set once I pressure‑boarded the pallets. Within minutes the boards were solidly in place, making the rest of the work a breeze.” — Mark L., Home renovation blogger
5. Maintenance & Longevity
- Wipe immediately when spills occur; use a damp cloth and mild soap.
- Avoid abrasive cleaners—they can dull the finish.
- Re‑apply a thin coat of polyurethane every 1‑2 years in high‑traffic kitchens.
- Check silicone seals annually; re‑seal any gaps to keep moisture out.
With proper care, a pallet backsplash can thrive for 10‑15 years—often longer than standard tile, especially when the finish is kept in good condition.
6. Cost Comparison: Pallet vs. Traditional Backsplash
| Backsplash Type | Material Cost (per ft²) | Installation Labor | Total Approx. Cost (20 ft²) |
|---|---|---|---|
| Pallet wood (incl. sealant) | $3‑$6 | DIY (free) | $60‑$120 |
| Ceramic tile | $7‑$12 | $200‑$300 (professional) | $340‑$540 |
| Glass tile | $12‑$25 | $250‑$350 | $490‑$850 |
| Custom wood paneling | $30‑$60 | $150‑$250 | $750‑$1,350 |
Numbers are based on average U.S. pricing (2025) and include a modest safety margin for tools and incidentals. The pallet option clearly wins on budget while delivering a unique look that off‑the‑shelf tiles can’t replicate.
7. Frequently Asked Questions
Q1: Are pallet backsplashes safe for food preparation?
A: Yes, provided you use clean, untreated pallets (marked “CP”) and finish the wood with a food‑safe sealant such as beeswax, shellac, or water‑based polyurethane. This creates a non‑porous barrier that prevents bacteria from penetrating the wood.
Q2: Will the wood warp near the stove or sink?
A: Proper sealing and leaving a tiny expansion gap (≈1/8 in) between boards minimize warping. Additionally, avoid direct contact with heat by installing a heat‑shield metal backsplash (e.g., stainless steel) above the stove if you cook at high temperatures.
Q3: Can I install a pallet backsplash over drywall?
A: Absolutely. Drywall provides a smooth, stable substrate. Just ensure the surface is clean and free of loose paint. For added strength, you can attach a thin 1/4‑in plywood backer before mounting the pallets.
Q4: How do I deal with nails that may be in the pallet wood?
A: Use a nail puller or punch and pliers to extract nails before cutting. If any nails remain embedded, a metal detector (or simply a magnet) can locate them. Once removed, sand the area to smooth any holes.
Q5: What if my kitchen has a textured wall (e.g., stucco)?
A: For uneven surfaces, apply a thin layer of construction adhesive to the board and press firmly. You may need to use extra-long finishing nails (2‑2.5 in) to secure the pallets through the texture.
Q6: Is it possible to combine pallet wood with other materials?
A: Yes! Mixed‑media backsplashes look fantastic. Pair a pallet section with metal tiles, ceramic mosaics, or glass accents for a modern‑industrial vibe.
Q7: How long does the protective finish need to cure before I start cooking?
A: Most water‑based polyurethane cures to touch in 4‑6 hours and reaches full hardness in 24‑48 hours. For oil‑based products, allow 72 hours before heavy use.
8. Final Thoughts
Creating a wood pallet kitchen backsplash is more than a DIY project—it’s an opportunity to express your personality, champion sustainability, and save money. By following the steps outlined above, you’ll end up with a handcrafted feature that feels warm under your fingertips and tells a story of transformation.
Remember: the beauty of a pallet backsplash lies in its imperfections. Embrace knots, grain patterns, and subtle variations; they’re the fingerprints of nature that make your kitchen truly yours.
Ready to get started? Gather those pallets, set up a workbench, and let the grain guide you. Your kitchen’s next conversation piece is only a weekend away.
Happy building!