Build Your Own Wood‑Pallet Compost Bin: A Step‑by‑Step Guide
If you’ve ever wondered how to turn kitchen scraps, yard waste, and even coffee grounds into black gold for your garden, the answer might be sitting in your shed right now: a wood pallet. Pallets are cheap, sturdy, and already designed for stacking—perfect characteristics for a DIY compost bin. In this post you’ll get complete plans, a shopping list, and practical tips to help you assemble a functional, attractive compost system that fits any backyard.
Why Choose a Wood‑Pallet Compost Bin?
| Benefit | How It Helps You |
|---|---|
| Affordability | Pallets often cost $0–$5 each (many are free from local retailers). |
| Ventilation | The slatted design allows airflow, speeding up decomposition. |
| Modular | You can expand or re‑configure the bin as your composting volume grows. |
| Aesthetic | With a little sanding and staining, the bin can blend with garden décor. |
| Reusability | When the bin reaches the end of its life, you can repurpose the wood for mulch beds or garden furniture. |
1. Planning Your Pallet Compost Bin
Before you start hammering, answer these three questions:
- How much waste will you generate?
A single‑family household typically produces 1–3 lb of compostable material per day. A 3‑ft × 3‑ft bin holds roughly 12 gal, enough for 1 week of kitchen scraps plus yard waste. - Where will you locate the bin?
Pick a spot with partial shade, good drainage, and easy access to your kitchen or garden. A concrete slab or a layer of gravel beneath the pallets prevents rot and keeps the bin stable. - Do you want a static bin or a tumbling system?
A static bin (the classic “stacked pallet” design) is simplest and works well for beginners. A tumbling bin requires additional hardware but makes turning the compost easier.
For the purpose of this guide, we’ll focus on the static, three‑pallet design—the most popular DIY option.
2. Materials & Tools Checklist
Below is a detailed list of everything you’ll need. Quantities are based on a 3‑ft × 3‑ft × 3‑ft bin (three full‑size pallets).
| Item | Quantity | Recommended Specs | Approx. Cost* |
|---|---|---|---|
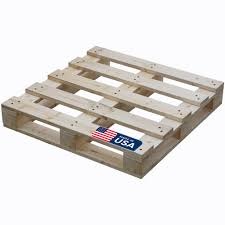
| Standard wood pallets (4 × 4 ft) | 3 | Heat‑treated (HT) or “phytosanitary” (no chemicals) | $0–$15 |
| 2‑in. exterior wood screws | 1 box (100) | Galvanized or stainless to avoid rust | $5 |
| 1‑in. nails (optional) | 1 box (100) | Finish nails for extra reinforcement | $2 |
| Hinges (for removable lid) | 2–3 | 3‑inch heavy‑duty | $6 |
| Latch or hasp (optional) | 1 set | Brass or stainless | $4 |
| Landscaping fabric (optional) | 1 sq ft | 6‑mil biodegradable | $2 |
| Gravel or crushed stone | 1 cu ft | For base layer | $3 |
| Drill / screwdriver | 1 | Cordless preferred | — |
| Saw (hand or circular) | 1 | For trimming pallets | — |
| Measuring tape, level, pencil | 1 set | — | — |
| Safety gear (gloves, goggles) | 1 set | — | — |
| Total Estimated Cost | — | — | $30‑$50 |
*Prices are based on U.S. average 2024 market rates; your actual cost may vary.
3. Preparing the Pallets
- Inspect for Damage – Look for broken slats, splinters, or nails protruding from the pallet. Remove any rogue nails with pliers.
- Clean – Sweep off dirt and debris. If the pallets have been used for chemicals, consider using a different source; you don’t want contaminants in your compost.
- Trim (if needed) – Most pallets are 48 × 40 in. If you prefer a square bin, cut the longer side to 40 in using a saw. Safety first: wear goggles and gloves.
- Optional: Sand & Stain – Lightly sand any rough edges and apply a natural, water‑based stain if you want the bin to match garden aesthetics. Allow to dry overnight.
4. Building the Bin – Step‑by‑Step
Step 1: Lay the Base
- Prepare the ground – Remove grass or weeds from a 3‑ft × 3‑ft area.
- Add a 2‑inch layer of gravel to improve drainage.
- Place the first pallet (bottom) on the gravel, slats facing upward.
Step 2: Attach the Side Walls
- Stack the second pallet directly on top of the first, aligning the slats.
- Secure the two pallets using 2‑in. screws: drive three screws through each corner and two in the middle of each side (total 8 screws).
Step 3: Add the Third Pallet (Lid)
- Place the third pallet on top, slats down (so they act as a lid).
- Attach hinges to the rear edge of the top pallet and the back side of the middle pallet. This creates a removable lid for easy turning and harvesting.
Step 4: Install a Latch (Optional)
If you want the lid to stay closed during heavy rain, bolt a simple latch or hasp on the front edge of the lid.
Step 5: Ventilation & Access
- Vent Holes – Drill a few ½‑inch holes on each side (4–6 total) near the bottom to encourage airflow.
- Access Door – If you prefer not to lift the lid each time, cut a 12‑inch opening on one side, reinforce the edges with a piece of plywood, and attach a small latch for a “front door.”
Step 6: Line the Bin (Optional)
Line the interior with landscaping fabric. This makes it easier to remove finished compost and helps keep pests out while still allowing air flow.
5. Using Your Pallet Compost Bin
| Phase | What to Do | Tips |
|---|---|---|
| Start | Add a 2‑inch layer of coarse carbon material (dry leaves, straw, shredded newspaper). | This creates a breathable base. |
| Feeding | Alternate layers of “green” (kitchen scraps, fresh grass) and “brown” (dry leaves, cardboard). Aim for a 1:2 green‑to‑brown ratio by volume. | Cut large items into <4‑inch pieces to speed breakdown. |
| Turning | Every 7–10 days, use a garden fork to stir the contents, moving material from the bottom to the top. | If you added a lid, open it fully while turning. |
| Moisture | The pile should be as damp as a wrung‑out sponge. Add water if it’s too dry, add dry carbon if too wet. | Feel it with your hand; no need for a meter. |
| Harvest | After 2–4 months (depending on temperature), the compost will be dark, crumbly, and smell earthy. Remove the lid, scoop out the finished material, and replace it with fresh layers. | Use a tarp underneath to catch any spillage when removing the compost. |
6. Maintenance & Troubleshooting
| Problem | Likely Cause | Solution |
|---|---|---|
| Odor | Too much green material, insufficient air, or excess moisture. | Add more brown material, turn more frequently, ensure vent holes aren’t blocked. |
| Pests (rats, flies) | Food left exposed, lack of lid. | Keep food scraps in a sealed container before adding, use the removable lid, or add a thin layer of soil on top of each fresh layer. |
| Bin sagging | Pallet slats cracked or overloaded. | Replace damaged pallets, avoid overfilling beyond 3‑ft height, or reinforce corners with extra screws. |
| Compost too slow | Low temperature, insufficient nitrogen, or poor aeration. | Turn more often, add coffee grounds or fresh grass (nitrogen), place bin in a sunny spot. |
7. Scaling Up – Bigger or Smaller Bins
If you have a larger garden or a community garden group, you can simply stack more pallets vertically (four or five pallets high) or create a double‑wall bin using two parallel rows of pallets with a gap for a pull‑out tray. Below is a quick comparison:
| Design | Pallets Needed | Capacity (gal) | Pros | Cons |
|---|---|---|---|---|
| Standard 3‑pallet (3 ft³) | 3 | ~12 | Simple, cheap, easy to lift lid | Limited capacity for heavy producers |
| Tall 5‑pallet | 5 | ~20 | More volume, less frequent turning | Heavier, harder to lift lid |
| Double‑wall with tray | 6 (3 per side) | ~25 | Easy harvest via pull‑out tray | Requires extra carpentry, slightly higher cost |
| Rotating (tumbler) conversion | 4+ (adds axle) | ~15 | Turning without manual labor | More complex build, need metal hardware |
Choose the layout that fits your space and the amount of compost you generate.
8. Environmental Impact & Benefits
- Diverts waste: A typical household can keep ≈200 lb of organic waste out of the landfill each year with a pallet bin.
- Reduces methane: Landfill organic waste produces methane, a greenhouse gas 28 times more potent than CO₂. Composting keeps carbon locked in soil instead.
- Improves soil health: Adding 1 lb of finished compost per 100 sq ft can increase soil organic matter by 0.5 %—boosting water retention and plant vigor.
Frequently Asked Questions (FAQ)
| Question | Answer |
|---|---|
| Can I use pallets that have the “HT” stamp? | Yes. HT (Heat‑Treated) pallets are safe for food‑related uses because no chemicals are used in the treatment. Avoid pallets marked “MB” (Methyl Bromide) or those that have obvious oil stains. |
| Do I need to line the bin with plastic? | No. Plastic liners trap moisture and inhibit airflow, leading to odor and slow decomposition. A breathable landscape fabric is a better choice if you want a barrier. |
| How long does it take for compost to be ready? | In warm climates (70–85°F) with regular turning, 2–3 months is typical. In cooler weather, expect 4–6 months. |
| What if my bin gets soggy after rain? | Add a thick layer of dry brown material (shredded newspaper, straw) on top to absorb excess water. Ensure the base gravel layer is adequate for drainage. |
| Can I compost meat, dairy, or pet waste? | It’s best to avoid these items in a simple pallet bin. They attract pests and can create strong odors. If you want to compost them, consider a sealed bokashi system first, then transfer the pre‑compost to your pallet bin. |
| Is it safe to use the finished compost on edibles? | Absolutely—once the compost is dark, crumbly, and smells earthy, it is mature and safe for all garden plants, including vegetables and herbs. |
| How do I know when the compost is mature? | Look for a uniform dark color, a crumbly texture, and a pleasant earthy smell. If you still see recognizable food pieces, it needs more time. |
| Can I build the bin on a wooden deck? | Yes, but place a moisture barrier (plastic sheet or rubber mat) between the pallet base and the deck to prevent rot. |
| Do I need to wear a mask while turning compost? | Optional but recommended if you have respiratory sensitivities. Turning can release dust and spores; a simple dust mask offers protection. |
Final Thoughts
Building a wood‑pallet compost bin is one of the most rewarding low‑cost, DIY projects you can undertake. You’ll turn everyday waste into a nutrient‑rich amendment, reduce landfill contributions, and gain a deeper connection to the soil cycles that sustain your garden.
Remember, the key to success lies in balance—mixing greens and browns, maintaining moisture, and turning regularly. With the plans and tips above, you can have a functional bin up and running in just a few afternoons.
Ready to get started? Gather those pallets, grab your screwdriver, and let the composting adventure begin!