DIY Magic: Turning Wooden Pallets into Stunning Crafts
Welcome to the world of pallet‑crafting! If you’ve ever walked past a stack of discarded wooden pallets and wondered what could be done with them, you’re in the right place. In this guide you’ll discover why pallets are a goldmine for DIY projects, learn step‑by‑step techniques, and get a handy FAQ to troubleshoot any hiccup along the way.
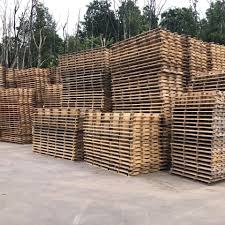
Why Choose Pallet Wood?
| Benefit | What It Means for You | Example Projects |
|---|---|---|
| Low Cost | Most pallets are free or cost pennies. | Coffee tables, garden planters |
| Eco‑Friendly | Upcycling reduces waste and your carbon footprint. | Wall décor, bookshelf |
| Versatile Size | Boards range from 8‑ft to 4‑ft lengths, perfect for many dimensions. | Outdoor benches, pet beds |
| Rustic Aesthetic | Natural weathered texture adds instant charm. | Headboards, picture frames |
| Sturdy | Built to hold heavy loads, ideal for functional furniture. | Workstations, storage cubes |
Getting Started: Essential Tools & Safety
| Tool | Purpose | Recommended Option |
|---|---|---|
| Circular Saw / Hand Saw | Cutting boards to size | Bosch 7‑1/4″ circular saw |
| Power Drill & Driver Bits | Drilling pilot holes, driving screws | DeWalt 20V cordless drill |
| Sandpaper (80‑150 grit) | Smoothing rough edges & splinters | 3M Pro Grade sandpaper sheets |
| Hammer & Nail Set | Quick assembly for simple joints | Stanley 16‑oz claw hammer |
| Safety Gear | Protect eyes, ears, lungs | Safety glasses, earplugs, dust mask |
| Measuring Tape & Square | Accurate cuts & alignment | Stanley 25‑ft tape, speed square |
Pro tip: Before you cut, inspect each pallet for nails, broken boards, or chemicals (e.g., heat‑treated “HT” pallets are safe; avoid “MB” treated with methyl bromide).
5 Easy Pallet Crafts to Try Right Now
| Project | Difficulty (1‑5) | Time Required | Key Materials | Approx. Cost* |
|---|---|---|---|---|
| Coffee Table | 2 | 3‑4 hrs | 2 pallets, 4‑inch wood screws, wood finish | $15 |
| Vertical Garden Planter | 3 | 2‑3 hrs | 1 pallet, landscape fabric, potting soil | $12 |
| Rustic Bookshelf | 3 | 4‑5 hrs | 2 pallets, brackets, sandpaper, paint | $20 |
| Pet Bed Frame | 1 | 1‑2 hrs | 1 pallet, foam cushion, fabric | $8 |
| Wall‑Mounted Headboard | 4 | 5‑6 hrs | 1 pallet, sandpaper, stain, mounting hardware | $18 |
*Costs assume you already own basic tools; prices are for additional materials only.
Below are detailed guides for two of the most popular projects: a Coffee Table (great for beginners) and a Vertical Garden Planter (perfect for green‑thumbs).
1️⃣ Build a Pallet Coffee Table
Materials
- 2 standard 48‑in pallets
- 2‑inch wood screws (≈30)
- Sandpaper (80‑150 grit)
- Clear polyurethane or chalk paint (optional)
Step‑by‑Step
- Disassemble the pallets using a pry bar and hammer. Remove all nails (a nail puller works best).
- Sort & Inspect the boards. Choose the straightest, most intact pieces for the tabletop surface.
- Cut to Size
- Trim the boards to a uniform length (e.g., 18×36 in).
- Sand all edges to smooth splinters.
- Create the Top
- Lay the boards side‑by‑side.
- Apply wood glue (optional) and clamp them together.
- Screw through the top into the bottom board for extra stability.
- Build the Base
- Use two pallets as legs. Cut them to your desired height (≈18 in).
- Attach a cross‑brace between the legs for rigidity.
- Finishing Touch
- Sand the entire piece once more.
- Apply a coat of polyurethane for durability, or paint for a pop of color.
Result: A sturdy, rustic coffee table you can be proud of—and a perfect conversation starter.
2️⃣ Vertical Garden Planter
Materials
- 1 pallet (cleaned)
- Landscape fabric or burlap
- Staple gun & staples
- Potting soil, herbs or succulents
Step‑by‑Step
- Clean the Pallet – Scrub with mild soap and let it dry.
- Remove Excess Boards – Keep only the slats that will hold plants; you’ll need about 6‑8 rows.
- Attach Landscape Fabric – Staple fabric to the back and sides to keep soil from falling out.
- Create Planting Slots
- Mark evenly spaced squares (≈6‑8 in).
- Drill pilot holes and insert small wooden dowels as “planters” that will hold soil.
- Fill With Soil – Pack soil into each slot, leaving a small gap at the top.
- Plant! – Insert seedlings or cuttings, water lightly, and enjoy your living wall.
Tip: Position the planter where it receives the right amount of sunlight for your chosen herbs (e.g., basil loves 6‑8 hrs of sun).
Maintenance & Longevity
| Issue | Quick Fix | Preventive Measure |
|---|---|---|
| Splintery Surface | Sand down and re‑apply finish | Sand after every major project |
| Rusty Nails | Replace with stainless‑steel screws | Use stainless or coated nails from the start |
| Moisture Damage | Seal with exterior-grade wood sealant | Keep planter soil away from the pallet’s inner layers |
| Warped Boards | Flatten with a weight & clamps overnight | Store pallets flat, off the ground, before use |
Frequently Asked Questions
Q1: Are all pallets safe for indoor use?
A: Look for the HT stamp (heat‑treated) which indicates no harmful chemicals. Avoid pallets marked MB (methyl bromide) or DP (dangerous pesticide).
Q2: How do I remove stubborn nails without damaging the wood?
A: Use a nail puller or a cat’s paw set at a shallow angle. If the nail bends, cut it off with a metal saw, then sand the spot smooth.
Q3: Can I paint pallet wood directly?
A: Yes, but first sand the surface and apply a primer to prevent peeling. For a rustic look, consider a chalk paint that highlights the grain.
Q4: What’s the best way to protect outdoor pallet furniture from weather?
A: Apply an exterior polyurethane sealant or a weather‑proof stain every 6‑12 months. Adding a crylic water‑based seal on top gives extra UV protection.
Q5: Do I need a permit to build a pallet shed or large structure?
A: Typically, small garden structures under 120 sq ft don’t require permits, but always check your local building codes.
Q6: How can I make the pallet look more polished?
A: After sanding, use a vacuum to remove dust, then apply a clear coat or wax for a smooth, glossy finish.
Q7: What if my pallet has a lot of gaps or broken boards?
A: Combine multiple pallets to “patch” gaps, or replace damaged sections with reclaimed lumber of similar dimensions.
Your Next Steps
- Scout for pallets – Check local warehouses, grocery stores, or online classifieds.
- Gather your tools – The table above lists everything you’ll need.
- Choose a project – Start with the coffee table if you’re a beginner, or jump straight into the garden planter for a splash of greenery.
- Share your creation – Post photos on social media with the hashtag #PalletCrafts to inspire others!
Ready to roll up your sleeves? With a bit of imagination, a couple of tools, and some old pallets, you can transform trash into treasure—one handcrafted masterpiece at a time. Happy building!