DIY Wood Pallet TV Mount: Turn Your Living Room Into a Rustic Gallery
If you’ve ever walked past a coffee‑shop wall adorned with reclaimed wood and thought, “I could do that at home,” you’re not alone. A wooden pallet TV mount is the perfect blend of low‑budget sustainability and eye‑catching style. In this guide, you’ll learn how to transform a simple, often‑discarded pallet into a sturdy, wall‑mounted TV cradle that looks as good as it functions.
Quick take‑away: With basic tools, a little patience, and a handful of inexpensive supplies, you can create a custom TV mount in a weekend—saving up to 70 % compared with a ready‑made metal bracket.
Why Choose a Pallet TV Mount?
| Feature | Pallet Mount | Commercial Metal Bracket |
|---|---|---|
| Cost | $15‑$30 (materials) | $80‑$200 |
| Aesthetic | Rustic, customizable | Industrial, limited finish options |
| Weight Capacity | 30 – 80 lb (depends on reinforcement) | 70 – 150 lb (engineered) |
| DIY Skill Level | Beginner‑intermediate | Minimal (install only) |
| Environmental Impact | Upcycled wood = lower carbon footprint | New metal production |
| Installation Time | 3‑5 hrs | 1‑2 hrs |
A pallet TV mount isn’t just a cost‑saving hack; it’s an opportunity to personalize your entertainment space. You can stain, paint, or leave the wood raw; you decide the final look.
What You’ll Need
Below is a comprehensive checklist that keeps you from scrambling to the hardware store midway through the project.
| Item | Suggested Product | Approx. Cost (USD) | Notes |
|---|---|---|---|
| Pallet (1–2 depending on TV size) | Clean, kiln‑dry pallet | $5‑$10 | Look for pallets stamped “HT” (heat‑treated). |
| Wooden backer board (½” plywood) | 4 × 8‑ft sheet | $15‑$20 | Provides extra rigidity. |
| 2‑inch wood screws | Deck‑type, rust‑proof | $5 | 2‑in. length is ideal for pallet + plywood. |
| 1‑inch wood dowels | ½‑inch diameter | $3 | Optional for hidden fasteners. |
| Wall anchors & lag bolts | Heavy‑duty, ¼‑in. | $7 | Choose anchors matching your wall (drywall, concrete, studs). |
| Bracket hardware | Heavy‑duty angle brackets | $8‑$12 | Steel brackets for extra support. |
| Sandpaper (80, 120, 220 grit) | 2‑pack | $4 | For smoothing rough pallet surfaces. |
| Stain or paint | Your choice of finish | $10‑$15 | Optional, for aesthetics. |
| Clear sealant (polyurethane) | 1‑qt | $8 | Protects wood from moisture. |
| Tools | Drill/driver, circular saw, level, measuring tape, safety goggles, dust mask | — | You may already own most of these. |
Total estimated cost: $77‑$106, depending on finish and extra hardware.
Tip: Many community groups or local businesses give away pallets for free. Keep an eye on Craigslist, Facebook Marketplace, or your neighborhood’s “freecycle” board.
Step‑By‑Step Build Process
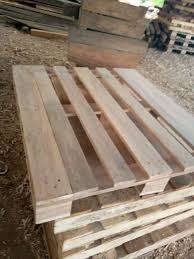
1. Source & Prep Your Pallet
- Inspect the pallet for cracks, broken slats, or nails.
- Remove all fasteners with a nail puller or pliers.
- Disassemble the pallet by separating the top boards from the bottom runners. You’ll use the top boards for the visible shelf and the side runners as reinforcement.
- Sand each board starting with 80‑grit, progressing to 220‑grit. Finish with a vacuum to remove dust.
2. Design the Mount Layout
- Measure your TV (width, height, weight). Add at least 2 in. to each side for clearance.
- Sketch a simple rectangle that matches these dimensions.
- Plan for a backer board: a ½‑in. plywood sheet that will sit flush against the wall, with the pallet boards attached on top.
3. Build the Core Structure
| Step | Action |
|---|---|
| A | Cut the plywood to the TV’s width + 4 in. (extra for brackets). |
| B | Drill pilot holes 1 in. from each edge; attach two steel angle brackets (2 × 2 in.) to the back of the plywood with lag bolts. |
| C | Lay the pallet boards horizontally across the plywood, leaving a ¼‑in. gap between each slat for expansion. Secure with 2‑in. wood screws (pre‑drill to avoid splitting). |
| D | Reinforce the sides: Attach the pallet’s side runners vertically along the outer edges of the plywood using dowels or hidden screws. This creates a “box” that distributes TV weight evenly. |
4. Mount to the Wall
- Locate studs using a stud finder; mark at least two studs that align with the width of your mount.
- Pre‑drill holes through the angle brackets into the studs.
- Insert lag bolts (¼‑in., 3‑in.) and tighten securely. For drywall without studs, use heavy‑duty wall anchors rated for 50 lb+ each.
- Check level. If the mount is even, the TV will sit perfectly horizontal.
5. Finishing Touches
- Stain or paint the visible wood to match your décor. Apply a thin coat, let dry, sand lightly, repeat for a second coat.
- Seal with polyurethane for moisture resistance—especially important if you have pets or live in a humid climate.
- Cable management: Drill a shallow groove (½‑in. wide) across the back of the plywood, run power and HDMI cords through, and cover with a decorative cable cover.
6. Hang Your TV
- Attach the TV’s mounting brackets (VESA‑compatible) to the back of the plywood using the same 2‑in. screws, aligning with the TV’s pre‑drilled holes.
- With help, lift the TV onto the pallet mount, ensuring the brackets slot securely into the plywood’s reinforcement.
Safety note: Always have a second person hold the TV during installation to avoid strain or damage.
Customization Ideas
| Idea | Description | Materials Needed |
|---|---|---|
| LED Backlighting | Install thin LED strips behind the pallet for ambient lighting. | LED strip kit, power source, diffuser. |
| Floating Shelf Integration | Add a shallow shelf below the TV for décor items. | Additional pallet slats, brackets. |
| Hidden Storage | Build a concealed compartment behind the TV for remotes and cables. | Hinged back panel, small latch. |
| Industrial Mix | Pair the pallet with black metal pipe brackets for a loft‑style look. | Black pipe fittings, pipe flanges. |
Maintenance & Longevity
- Inspect screws every 6 months; tighten any that have loosened due to vibration.
- Re‑seal the wood annually if you notice any water spots or fading.
- Avoid over‑loading: Never exceed the weight rating (typically 80 lb for a reinforced pallet mount).
Frequently Asked Questions
| Question | Answer |
|---|---|
| Do I need a specific type of pallet? | Choose pallets stamped “HT” (heat‑treated) rather than “MB” (treated with methyl bromide). HT pallets are safer for indoor use. |
| Can I mount a 65‑inch TV? | Yes, as long as the combined weight (TV + mount) stays within the reinforced pallet’s capacity—generally up to 80 lb. For larger TVs, add extra steel brackets or a secondary backer board. |
| What if my wall isn’t stud‑filled? | Use toggle bolts or molly anchors rated for at least 50 lb each. For maximum safety, reinforce with a wooden cleat that spans across multiple studs. |
| Will the wood warp over time? | If you properly seal the wood and keep it away from direct moisture, warping is minimal. Using kiln‑dry pallets further reduces this risk. |
| Can I paint the pallet after installation? | Absolutely, but apply a primer first to seal the wood grain and ensure even paint coverage. |
| Is a professional installer required? | No, the DIY approach is safe for most homeowners comfortable with basic power tools. However, if you’re unsure about wall integrity or weight capacity, consult a contractor. |
| How much time does the project take? | Expect 3‑5 hours total: 1 hour for prep, 2 hours for construction, 1 hour for finishing and mounting. |
Final Thoughts
A DIY wood pallet TV mount does more than just hold your screen; it creates a conversation piece that reflects your commitment to creativity and sustainability. By following the steps outlined above, you’ll have a custom‑built, rustic‑styled mount that not only saves money but also showcases your handiwork.
Ready to get started? Gather your pallet, roll up your sleeves, and turn that bland wall into a centerpiece that earns both compliments and envy.
Pro tip: Document your build with photos and share them on social media using #PalletTVMount. You’ll inspire others—and might even pick up a few more clever design ideas along the way!