DIY Wood‑Pallet Vertical Garden – A Step‑by‑Step Guide for Green‑Thumb Beginners
If you’ve ever stared at a blank wall and imagined a burst of herbs, succulents, or flowering vines climbing upward, you’re not alone. Vertical gardening is the perfect solution for small‑space living, and a reclaimed wood pallet gives you a rustic, budget‑friendly frame to get started. In this post you’ll learn how to turn an ordinary pallet into a thriving, eye‑catching garden, from selecting the right pallet to planting, watering, and maintaining your living wall.
Why a Pallet?
| Benefit | How It Helps Your Garden |
|---|---|
| Low Cost | Pallets are often free from hardware stores, warehouses, or online marketplaces. |
| Eco‑Friendly | Reusing a pallet reduces waste and gives new life to a piece of lumber that would otherwise be discarded. |
| Easy to Mount | Most pallets are lightweight enough to hang on a wall with a few brackets or to lean against a fence. |
| Built‑In Grid | The slats naturally create a grid for attaching planters, fabric pockets, or modular trays. |
| Rustic Aesthetic | The weathered wood adds texture and charm, especially in modern urban gardens. |
What You’ll Need
Below is a concise checklist that covers tools, materials, and optional extras. Feel free to adapt the list to suit your space, climate, and plant preferences.
| Category | Item | Quantity | Notes |
|---|---|---|---|
| Pallet | Reclaimed wood pallet (heat‑treated, “HT”) | 1 | Avoid chemically treated pallets (marked “MB”). |
| Preparation | Sandpaper (80‑grit) | 1 sheet | For smoothing rough edges. |
| Exterior wood sealer or paint | 1 quart | Protects against rot; choose a non‑toxic, water‑based product. | |
| Drill + 1/8” wood bits | 1 set | For making planter holes or attaching hardware. | |
| Mounting | Heavy‑duty brackets or L‑shapes | 4–6 | Stainless steel recommended for outdoor use. |
| Toggle bolts or masonry anchors | As needed | Depends on wall material (drywall, brick, concrete). | |
| Planters | Fabric grow bags (6‑inch) or recycled plastic trays | 6–12 | Size depends on plant choice; see “Plant Selection” table. |
| Landscape fabric (optional) | 1 roll | Prevents soil from leaking through pallet gaps. | |
| Soil & Fertilizer | High‑quality potting mix (soilless) | 5–10 gal | Light, well‑draining mix works best on pallets. |
| Slow‑release organic fertilizer | 1 bag | Provides nutrients for 2–3 months. | |
| Plants | Herbs, succulents, lettuce, strawberries, etc. | As desired | See “Plant Recommendations” table. |
| Watering | Garden hose with a spray nozzle or drip‑irrigation kit | 1 set | Drip system saves water and reduces runoff. |
| Safety | Gloves, safety glasses, dust mask | 1 each | Always wear protection when sanding or drilling. |
Step‑by‑Step Construction
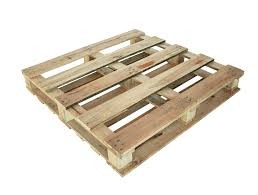
1. Select & Inspect Your Pallet
- Look for damage: Split boards, broken nails, or signs of rot. Replace any compromised slats.
- Check the stamp: “HT” (heat‑treated) pallets are safe for food‑grade gardening; “MB” (methyl bromide) pallets are not.
2. Clean & Prep the Wood
- Remove all nails with a pry bar or a nail puller.
- Sand the surface lightly to eliminate splinters and rough edges. A power sander will speed this up, but a hand block works fine for small pallets.
- Wipe down with a damp cloth to remove dust.
3. Seal or Paint the Pallet
Applying a protective coating extends the pallet’s life and prevents chemicals leaching into the soil.
- Brush or spray an even coat of exterior‑grade, low‑VOC sealer.
- Allow 24 hours to dry before moving on.
4. Mount the Pallet
- Measure the wall or fence area where you’ll hang the pallet; leave at least a 2‑inch clearance from the ceiling to avoid splashing.
- Attach brackets to the pallet’s top corners (and middle if long). Pre‑drill holes to avoid splitting.
- Secure brackets to the wall with appropriate anchors. Double‑check that the pallet is level.
Pro tip: If you’re mounting on a brick wall, use a masonry drill bit and plastic sleeves for the bolts.
5. Create Planting Compartments
There are three popular ways to turn the pallet into a planter:
| Method | How to Do It | Best For |
|---|---|---|
| Fabric Grow Pockets | Slip 6‑inch fabric bags into the pallet’s slats, securing the top with a zip tie. Fill with soil. | Herbs, lettuce, small annuals. |
| Recycled Plastic Trays | Cut trays to fit between slats, fasten with zip ties or small brackets. | Succulents, strawberries (need deeper soil). |
| Landscape Fabric Liner | Staple a sheet of landscape fabric across the pallet, then poke holes for individual pots. | Mixed planting, easy soil changes. |
Whichever method you choose, make sure each compartment has a drainage hole (½‑inch) at the bottom to prevent waterlogging.
6. Add Soil & Fertilizer
- Fill each compartment with the potting mix, leaving about ½ inch from the top.
- Mix in slow‑release fertilizer according to package instructions.
- Lightly tamp the soil to eliminate air pockets, but keep it fluffy.
7. Plant Your Greens
Refer to the “Plant Recommendations” table for spacing and sunlight requirements.
| Plant | Recommended Spacing | Sunlight | Water Needs | Ideal Season |
|---|---|---|---|---|
| Basil | 6‑8 in | Full sun (6‑8 h) | Keep soil consistently moist | Spring–Fall |
| Lettuce (Butterhead) | 8‑10 in | Partial shade (4‑6 h) | Regular, shallow watering | Spring–Fall |
| Strawberry (Everbearing) | 12 in | Full sun | Moderate, allow surface to dry | Spring–Fall |
| Succulent (Echeveria) | 6‑8 in | Full sun to light shade | Infrequent, let soil dry between waterings | Year‑round (warm climates) |
| Mint (Spearmint) | 10‑12 in | Partial shade | Keep soil moist, but avoid soggy | Spring–Fall |
| Tomato (Patio) | 12‑15 in | Full sun | Consistent, deep watering | Warm season |
- Plant depth: Follow the seed packet or plant label; usually, the crown sits just above the soil line.
- Label each pot (optional) to remember which herb is where—especially handy for a mixed garden.
8. Set Up Irrigation
- Drip system: Lay a thin‑walled drip line across the back of the pallet, connecting each planter with micro‑emitters (¼‑gallon/hour).
- Timer: Attach a programmable timer (12‑hour cycle works well for most herbs).
- Manual spray: If you prefer, a gentle hose spray works, but be careful not to wash soil out of the compartments.
9. Maintenance Checklist
| Task | Frequency | Details |
|---|---|---|
| Watering | 1–2 times/day (summer) or as needed | Check soil moisture 2 inches deep; water until it runs out of drainage holes. |
| Harvesting | As soon as leaves are 3–4 inches long | Pinch or cut herbs regularly to encourage bushier growth. |
| Fertilizing | Every 6–8 weeks | Add a liquid organic fertilizer or top‑up slow‑release granules. |
| Pest Inspection | Weekly | Look for aphids, spider mites, or fungal spots; treat with neem oil or insecticidal soap. |
| Cleaning | Quarterly | Remove dead foliage, wipe down the pallet surface, re‑seal any exposed wood if needed. |
Bonus Tips for Success
- Rotate the Pallet every 4–6 weeks to ensure all sides receive equal sunlight, especially if one side is shaded.
- Add a protective splash guard (a shallow tray) beneath the pallet to catch excess water and protect the wall.
- Experiment with vertical herbs (e.g., oregano, thyme) that naturally trail down the slats, creating a cascading effect.
- Use reclaimed containers (tin cans, mason jars) for a mixed‑media look—just drill drainage holes.
- Integrate LED grow lights for indoor or low‑light spaces; clip them onto the top of the pallet for supplemental illumination.
Frequently Asked Questions (FAQ)
Q1: Can I use any pallet I find in a store?
A: Only use pallets stamped HT (heat‑treated). Pallets marked MB have been treated with methyl bromide, a toxic fumigant unsuitable for food plants. If the stamp is unclear, ask the store for confirmation or choose a new, untreated pallet.
Q2: How do I prevent the wood from rotting over time?
A: Apply a quality exterior sealer or paint before installing the pallet, and re‑apply every 2–3 years. Ensure good drainage in each planter so water doesn’t sit against the wood for extended periods.
Q3: What’s the best soil mix for a vertical pallet garden?
A: A lightweight, soilless potting mix (e.g., peat‑based or coconut coir blend) with perlite or vermiculite for aeration works best. It stays light enough not to overload the pallet while providing excellent drainage.
Q4: My pallet looks wobbly after loading it with soil. How can I reinforce it?
A: Add extra cross‑bracing using 1‑by‑2 lumber behind the pallet, or mount the pallet to a sturdy frame (e.g., a garden fence). You can also distribute weight evenly by placing heavier plants (like tomatoes) in the lower sections.
Q5: How often should I fertilize my vertical garden?
A: Use a slow‑release organic fertilizer at planting time, then supplement with a liquid fertilizer every 6–8 weeks during the growing season. Over‑fertilizing can cause root burn and attract pests.
Q6: Can I grow root vegetables (e.g., carrots) in a pallet garden?
A: Root vegetables need deeper soil than most pallet compartments provide. If you want to try, use deeper trays (8–10 inches) and choose short‑root varieties like baby carrots or radishes.
Q7: My plants are drooping after a hot afternoon. What’s happening?
A: Heat stress and rapid water loss are common in vertical gardens. Ensure you’re watering early in the morning or late evening, provide some afternoon shade with a lightweight shade cloth, and check that the soil isn’t drying out completely between waterings.
Q8: Is it safe to grow edible herbs on a pallet attached to an exterior brick wall?
A: Yes, as long as the pallet is properly sealed and the bricks are clean. Avoid using pallets that have been in contact with chemicals or oil. Rinse your herbs before harvesting to remove any dust or debris.
Wrap‑Up: Your Pallet, Your Green Space
By taking a few hours and a modest budget, you can transform a discarded wood pallet into a living tapestry of herbs, greens, and flowers. Not only does a vertical garden free up floor space, it also brings fresh produce to your doorstep, improves air quality, and adds a splash of natural beauty to any wall.
Remember: Preparation is the secret—choose a safe pallet, seal it well, and give each plant the right amount of light, water, and nutrients. With the tables above as your checklist and the step‑by‑step guide, you’re fully equipped to build a DIY wood‑pallet vertical garden that will flourish season after season.