Transform Ordinary Pallets into Stunning Art: A Complete Guide to Pallet Artwork
Pallet Artwork. Whether you’re a seasoned DIY enthusiast or a curious beginner, pallets are a surprisingly versatile canvas. In this post you’ll discover how to turn cheap, reclaimed wood into eye‑catching wall art, functional décor, and even large‑scale installations. Follow the step‑by‑step system, explore the best materials, budget options, and avoid the common pitfalls that trip up many first‑timers. Pallet Artwork.
1. Why Choose Pallet Artwork?
| Benefit | What It Means for You |
|---|---|
| Low Cost | A single pallet can be sourced for free or for a few dollars from a warehouse, hardware store, or online marketplace. |
| Eco‑Friendly | Repurposing pallets keeps wood out of landfills and reduces demand for new lumber. |
| Easy to Source | Pallets are ubiquitous in shipping; you’ll always find a supply nearby. |
| Customizable Size | Pallets come in standard (48×40 in) and oversized dimensions, letting you scale projects up or down. |
| Rugged Durability | Built to withstand freight, pallet wood is sturdy enough for indoor and outdoor pieces. |
If you’ve ever stared at a blank wall and wished for a statement piece that didn’t break the bank, pallet artwork offers a solution that is both affordable and personal. The raw, rustic texture of reclaimed wood adds character, while a little creativity turns the mundane into the memorable.
2. Getting Started: The Essentials
Before you dive into cutting, sanding, and painting, assemble a small toolkit. Below is a quick-reference table of the must‑have supplies and their typical price range (USD).
| Tool / Material | Purpose | Typical Cost | Tips for Selection |
|---|---|---|---|
| Hammer or pallet splitter | Disassemble pallets safely | $10–$25 | Choose a claw hammer with a comfortable grip; a pallet splitter reduces splinter risk. |
| Circular saw or handsaw | Cut boards to size | $30–$150 (saw) | A 7‑inch circular saw with a fine-tooth blade works well for smooth cuts. |
| Power sander (orbital) | Smooth rough surfaces | $40–$120 | If budget is tight, sand by hand with medium‑ and fine‑grit sandpaper. |
| Wood glue & clamps | Secure joints | $8–$20 | Use a strong, waterproof wood glue for outdoor pieces. |
| Nails/screws (varied lengths) | Fasten components | $5–$15 | Stainless steel or coated fasteners resist rust. |
| Paint / stain / sealant | Finish & protect | $10–$50 per can | Choose a low‑VOC paint for indoor air quality; marine‑grade sealant for exterior work. |
| Safety gear (gloves, goggles, mask) | Personal protection | $15–$30 | A dust mask (N95) is essential when sanding. |
| Measuring tape & square | Accurate layout | $5–$12 | A 25‑ft tape and a speed square keep cuts square. |
| Sandpaper (80, 120, 220 grit) | Hand‑sanding, edges | $5–$10 per pack | Keep a variety on hand for fine‑tuning. |
Total approximate startup cost: $130–$430 (you can cut this in half by borrowing tools or using a community maker space).
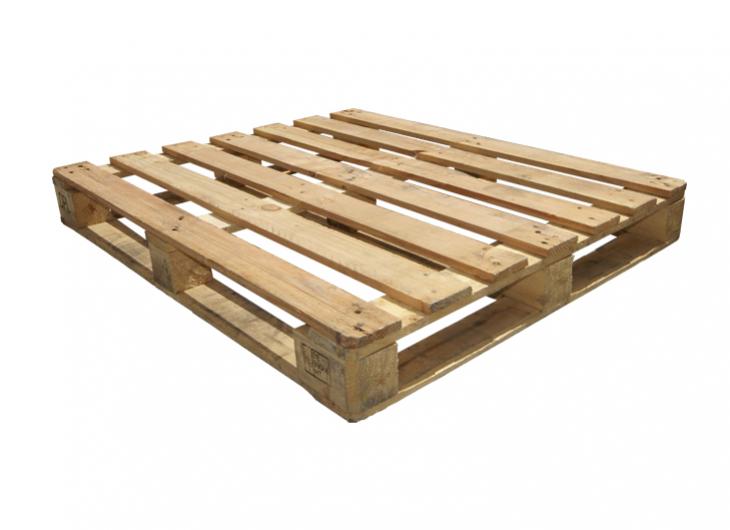
3. Sourcing Safe Pallets
Not every pallet is created equal. Follow these guidelines to ensure you’re working with wood that is safe for indoor décor:
| Label | Meaning | Is it safe? |
|---|---|---|
| HT (Heat‑Treated) | Treated with heat, no chemicals | ✅ Yes |
| MB (Methyl Bromide) | Fumigated with a toxic gas | ❌ No (avoid for indoor use) |
| KD (Kiln‑Dried) | Dried in a kiln, chemically clean | ✅ Yes |
| EP (Ex‑Port) | Export‑grade, usually untreated | ✅ Usually safe, inspect for stains |
| CT (Chemical Treated) | Preservatives applied, may release VOCs | ❌ No for indoor art |
Pro tip: Look for pallets stamped with “HT” or “KD”. If you’re unsure, run a quick smell test—any strong chemical odor means the pallet should stay outdoors or be discarded.
4. Designing Your Piece
4.1 Choose a Style
- Rustic Collage – Overlap reclaimed boards to form a shabby‑chic backdrop.
- Geometric Wall Art – Cut pallets into uniform squares or triangles, then arrange in a pattern.
- Nature‑Inspired Silhouettes – Use a jigsaw to cut animal or tree shapes; paint or stain for contrast.
- Functional Decor – Turn a pallet into a coat rack, shelf, or planter wall.
4.2 Sketch It Out
Even a quick hand‑drawn layout on graph paper saves time. Draft the dimensions, note the grain direction (horizontal vs. vertical), and decide where you’ll place fasteners—visible nails add industrial flair, while hidden screws give a clean look.
4.3 Calculate Material Requirements
Below is a sample calculation for a 4‑ft × 4‑ft geometric panel composed of 12‑inch squares.
| Component | Quantity | Unit Size | Total Area |
|---|---|---|---|
| Pallet boards (cut to 12‑in) | 16 pieces | 12 × 48 in | 64 sq ft |
| Backing board (optional) | 1 sheet | 4 × 4 ft | 16 sq ft |
| Nails/screws | ~120 | – | – |
| Paint or stain | 1 gallon | – | – |
You can easily adapt the table for different dimensions by swapping the “Unit Size” column.
5. Step‑by‑Step Build Process
“Measure twice, cut once.”
– A mantra that saves wood and frustration.
Step 1 – Disassemble & Clean
- Remove all nails and staples with pliers or a nail puller.
- Separate boards using a pallet splitter or a reciprocating saw (set to a shallow depth).
- Scrape off paint, grime, or splinters using a hand scraper or a power washer (if you plan to use the wood outdoors).
Step 2 – Sort & Cut
- Sort boards by grain direction; for a cohesive look, keep the grain consistent across your design.
- Measure and mark cut lines with a pencil and square.
- Cut using a circular saw; always wear safety goggles and keep the blade guard engaged.
Step 3 – Sand & Prepare
| Sanding Stage | Grit | Goal |
|---|---|---|
| Rough shaping | 80 | Remove splinters, level uneven edges |
| Smoothing | 120 | Prepare surface for paint/stain |
| Finishing | 220 | Achieve a silky feel for final coating |
If you prefer a raw, distressed look, stop after the 120‑grit stage.
Step 4 – Assemble
- Lay out pieces on the floor exactly as you want them on the wall.
- Pre‑drill pilot holes (½‑inch spacing) to prevent splitting.
- Fasten with nails for a rustic vibe, or use wood screws with concealed heads for a cleaner finish.
- Add a backing board (MDF or plywood) if the piece will be hung on the wall; this adds rigidity.
Step 5 – Finish (Paint, Stain, Seal)
- Prime if you’re using latex paint; this improves color coverage.
- Apply stain with a brush or cloth to let the grain show; wipe excess after 5–10 minutes.
- Seal with a water‑based polyurethane for indoor pieces or a marine‑grade spar varnish for outdoor installations. Use 2–3 thin coats, sanding lightly (220 grit) between coats.
Step 6 – Hang or Install
- Mounting hardware: For heavy panels, use heavy‑duty picture hooks or a French cleat system.
- Locate studs in your wall; drill pilot holes and secure with 3‑inch wood screws.
- Level the piece with a bubble level before tightening the final screws.
6. Advanced Techniques & Creative Twists
| Technique | What It Adds | Tools Needed |
|---|---|---|
| Distressed Burnishing | Weathered, antique appearance | Wire brush, steel wool, sandpaper |
| Layered Shadow Boxes | Depth, 3‑D effect | Small brackets, spacer wood |
| Integrated Lighting | Ambient glow | LED strip lights, battery pack |
| Mixed Media | Color, texture | Fabric, metal mesh, reclaimed windows |
| Outdoor Planters | Living art | Waterproof liner, potting soil |
Experiment with one at a time; each technique can transform a simple panel into a conversation starter.
7. Budgeting: How Much Will It Cost?
Below is a cost breakdown for three common pallet‑art projects. Prices are average U.S. retail rates (2025).
| Project | Materials (USD) | Tools (USD*) | Total (USD) |
|---|---|---|---|
| Small 12×12 in collage | Pallet wood $5, paint $8, nails $2 | Hand sander (borrowed) | $15 |
| 4×4 ft geometric wall (12‑in squares) | Boards $25, plywood backing $12, stain $10, sealant $12, screws $5 | Circular saw $80 (or rent $15) | $84 (or $19 if renting) |
| Outdoor planter wall (6×8 ft) | Boards $45, marine sealant $30, LED strips $20, planter liners $15 | Power drill $50 | $160 |
*Tools are one‑time costs; you’ll amortize them across many future projects.
8. Common Mistakes & How to Avoid Them
| Mistake | Why It Happens | Solution |
|---|---|---|
| Using chemically treated pallets | Assumes any pallet is “just wood.” | Verify the pallet stamp; stick to HT or KD. |
| Skipping sandpaper between coats | Rushed finish looks uneven. | Lightly sand (220 grit) between each sealant layer. |
| Over‑driving nails | Splits the wood, weakening joints. | Use a nail set to drive just below the surface. |
| Ignoring grain direction | Paint runs, patterns look chaotic. | Align grain for visual harmony or deliberately contrast. |
| Hanging without a backing | Warps over time, especially on large pieces. | Attach a plywood or MDF backing for rigidity. |
9. Frequently Asked Questions (FAQ)
Q1: Can I use pallets that have been painted or stained already?
A: Yes, but you’ll need to sand aggressively (80 → 120 → 220 grit) to remove the old finish and expose a clean surface. If the previous coating contains lead (common in pre‑1978 paint), wear a respirator and test the wood before proceeding.
Q2: How do I prevent splinters when handling reclaimed pallet wood?
A: Wear cut‑resistant gloves, sand all rough edges, and apply a sealant or clear coat on surfaces that will be touched.
Q3: Is it safe to hang pallet art in a kitchen or bathroom?
A: Absolutely, as long as you seal the wood with a moisture‑resistant varnish. For high‑humidity areas (bathrooms), use a marine‑grade spar varnish and consider a silicone seal around the edges.
Q4: What’s the best way to transport large pallet panels without damaging them?
A: Use a dolly or hand truck and keep the panel upright. If you must lay it flat, place a soft blanket underneath and cover with a sheet of cardboard to prevent scratches.
Q5: How long does a finished pallet artwork last?
A: When properly sealed, indoor pieces can last 5‑10 years before the finish begins to wear. Outdoor installations, protected with UV‑blocking sealant, typically maintain their appearance for 3‑5 years.
Q6: Can I incorporate reclaimed pallet wood into a mural or larger wall installation?
A: Yes! Treat each pallet as a “tile” in a larger mosaic. Use a French cleat system to attach each section individually—this also makes future repairs easier.
Q7: Do I need a building permit for outdoor pallet installations?
A: Usually not for decorative pieces under 8 ft tall, but check local ordinances if you’re attaching it to a structural wall or using it as a load‑bearing element.
10. Next Steps – Your First Pallet Project
- Source two to three HT pallets from a local warehouse.
- Decide on a 24‑inch square collage (simple, quick, and budget‑friendly).
- Gather the tools listed in the “Essentials” table (borrow a sander if possible).
- Follow the step‑by‑step guide—measure, cut, sand, paint, seal, and hang.
- Show off your creation on social media with the hashtag #PalletArtDIY—you’ll inspire others and may even discover new ideas for your next piece.
Final Thought
Pallet artwork is more than a DIY trend; it’s a sustainable design philosophy that empowers you to turn overlooked material into personal expression. By mastering the basics—safe sourcing, proper preparation, and thoughtful finishing—you open a world of possibilities from rustic wall hangings to functional outdoor installations. So roll up your sleeves, grab a hammer, and let the reclaimed wood tell your story.
Happy building!